6 Powerful Water Heater Maintenance and Care Guide Safety Tips Plumbers Recommend
Meta Description: Water heater safety tips for maintenance, cleaning care guide can increase the unit life, save energy bills and prevent dangerous breakdowns. Here’s what plumbers actually recommend.
Plumber Recommends 6 Effective Water Heater Maintenance and Care
If you’ve ever stepped into a cold shower on a winter morning, you know just how much you depend on your water heater. But most homeowners don’t ever give this appliance a second thought — until something goes wrong.
Here’s a reality check: some upkeep makes a big difference.
Plumbers see the same problems repeatedly. Sediment buildup. Corroded anode rods. Leaky pressure valves. The overwhelming majority of it is preventable with basic care.
This guide dives into 6 impactful water heater maintenance and care guide safety tips that local plumbers stress. No matter if you have a traditional tank-style unit or a newer tankless model, these tips will help keep you safe and save money — all while getting additional years out of your heater.
Let’s get into it.
Why You Can’t Skip Water Heater Service
Most water heaters are designed to run for 8 to 12 years. With proper maintenance, some tankless models can exceed 20 years. But neglect one? You could be facing a replacement in five years — or, even worse, a flooded basement.
Here’s what can go wrong when maintenance is deferred:
- Sediment accumulates and causes the heater to strain
- Without explanation, energy bills creep up
- The pressure relief valve fails silently
- The inside of the tank is susceptible to corrosion
- In rare but serious cases, pressure buildup can lead to tank rupture
None of this is hyperbole or drama. Plumbers really do deal with these situations every week.
The good news? Stopping all of this requires less than an hour a year.
How Often Should You Service Your Water Heater?
Before jumping into the tips, here is a quick guide on how frequently to do each task:
| Maintenance Task | Recommended Frequency |
|---|---|
| Check the pressure relief valve | Every 6 months |
| Flush sediment from the tank | Once a year |
| Inspect the anode rod | Every 1–3 years |
| Check water temperature settings | Once a year |
| Inspect for leaks and corrosion | Every 6 months |
| Professional inspection | Every 1–2 years |
Tuck this table on your fridge or save it in your phone. It’s the simplest way to keep on track.
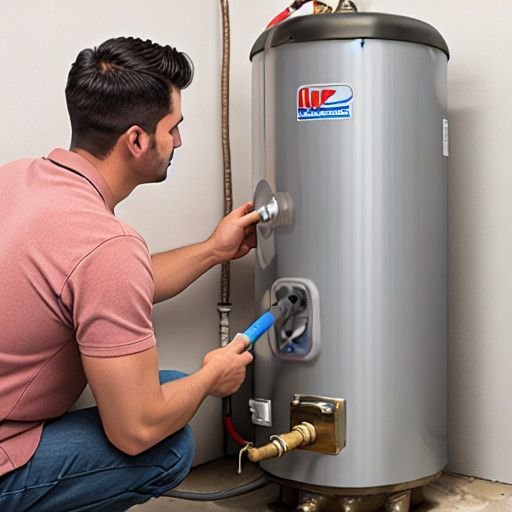
Tip #1 — Flush the Tank Once a Year to Remove Sediment
This is the one thing that plumbers wish homeowners would do more.
Minerals such as calcium and magnesium accumulate at the bottom of your water heater tank over time. This layer of sediment acts like insulation — but in the worst sense. The barrier lies between the burner and the water, requiring the heater to expend more energy simply to heat that same volume of water.
You might notice:
- A popping or rumbling sound from the tank
- Hot water running out more quickly than normal
- Energy bills rising month after month
How to Flush Your Water Heater Step by Step
It’s easier than it sounds. Here’s how to do it safely:
- Turn off the heater. If gas, set it to “pilot,” or switch off the breaker if electric.
- Attach a garden hose to the drain valve at the bottom of the tank.
- Route the other end of the hose to a floor drain or outside.
- Shut off the tank’s supply of cold water.
- Turn on a hot water faucet somewhere in the house to allow air into the system.
- Open the drain valve and let it all flow out.
- Slowly turn the cold water back on to wash out any remaining sediment.
- Close it all up, refill the tank, and restart the heater.
This entire process takes around 20–30 minutes. Do it once a year, and your heater will thank you.
Plumber Pro Tip: If your water heater has never been flushed and it is over 3–4 years old, you might want to be cautious. Old sediment could even be plugging a small rust hole. Flushing can disturb it. If you’re not sure, call a plumber first.
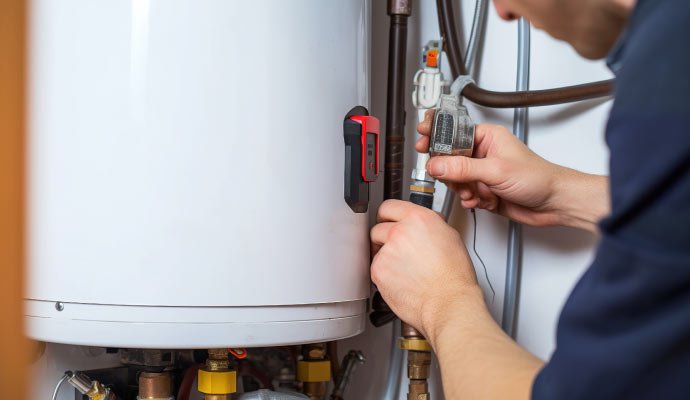
Tip #2 — Test the Pressure Relief Valve Twice a Year
They are known as temperature and pressure relief valves — although most people call them T&P valves — and they’re one of the most crucial safety elements on your water heater.
Its job is simple: when pressure or temperature starts to approach dangerous levels inside the tank, this valve opens and releases it. A water heater without a functioning T&P valve can become very unsafe.
And yet most homeowners have never had theirs tested.
What Happens When This Valve Goes Wrong
A defective T&P valve can fail in either direction:
- It can get stuck in the open position, resulting in continuous dripping and water waste
- It can become stuck closed, and pressure has nowhere to escape
The second failure is the dangerous one. Pressure builds and builds with no release.
How to Test the T&P Valve
Testing takes about 60 seconds:
- Locate the valve — it’s likely on the side or top of the tank, with a small lever and a pipe leading down
- Place a bucket under the discharge pipe
- Slightly raise the lever (just one or two seconds)
- Hot water or steam should release, then stop when you let go
If nothing comes out, or if it continues dripping after you release it, the valve needs to be replaced. This is a task for a licensed plumber.
Test this every six months. Put it in your calendar like a smoke detector check.
Tip #3 — Inspect and Replace the Anode Rod Before It Fails
This is the most neglected piece of water heater maintenance — and it’s the reason so many tanks rust from the inside.
The anode rod is a long metal rod (typically magnesium or aluminum) inside your tank. It functions through a mechanism known as sacrificial protection. In short, it corrodes so your tank doesn’t have to.
Once the anode rod is fully dissolved, there’s no longer any protection for your tank. Rust sets in fast after that.
For a deeper look at how anode rods and other components work together to protect your system, Water Heater Care is a great resource to bookmark.
Signs That Your Anode Rod Is Due for Replacement
- Your hot water has the scent of rotten eggs or sulfur
- The water has a faint metallic taste
- Your tank is more than 3 years old and the rod has never been inspected
How to Inspect the Anode Rod
- Keep the heater powered off and water supply disconnected
- Find the anode rod — it’s usually near the top of the tank, sometimes beneath a plastic cap
- Use a 1 1/16″ socket wrench to loosen and remove it
- Check its condition:
| Rod Condition | What It Means |
|---|---|
| Thick and coated | Still in good shape |
| Thinning, calcium-coated | Getting close to needing replacement |
| Less than ½ inch wide or missing sections | Replace immediately |
You can pick up a new anode rod at most hardware stores for $20–$50. The average cost of a new water heater is $800–$2,000. The math is obvious.
Tip #4 — Keep Your Water Temperature in the Safe Zone
Most people never adjust the temperature dial on their water heater. It is factory set and never changes.
That factory setting, however, isn’t always correct.
At What Temperature Should You Set Your Water Heater?
The U.S. Department of Energy advises that 120°F (49°C) is the sweet spot. Here’s why:
- It’s hot enough to kill most dangerous bacteria
- It minimizes the chances of scalding injuries
- It reduces your energy bill (heating water uses 14–18% of household energy)
- It slows mineral buildup in the tank
Some past guidelines recommended 140°F for households with persons who have compromised immune systems. But for the majority of homes, 120°F is the sweet spot.
The Risks of Setting It Too High
| Temperature Setting | Risk Level |
|---|---|
| Below 110°F | Bacteria growth risk (Legionella) |
| 110–120°F | Safe for most households |
| 120°F | Recommended standard |
| Above 140°F | Scalding risk, especially for children and elderly |
Check your thermostat dial. If it is set higher than 120°F, turn it down. It will save you energy while lowering your risk of injury at the same time.
Tip #5 — Inspect for Leaks, Rust, and Corrosion Frequently
Your water heater doesn’t have to be making noise or refusing to work for a serious problem to be developing. Corrosion and small leaks usually develop gradually and quietly.
Early detection is the difference between a $15 repair and a $1,500 emergency replacement.
Where to Look and What to Look For
Check visually every six months. Here’s what to inspect:
Around the base of the tank:
- Puddles or wet spots (even small ones)
- White mineral deposits (an indicator of previous slow leaks)
- Orange or brown rust stains
At the connections:
- Check the inlet and outlet pipes at the top
- Look for green or white corrosion near fittings
- Check for moisture around pipe connections
At the drain valve:
- Ensure that it is entirely closed and not dripping
On the tank body:
- Visible rust on the exterior is a yellow flag
- Bubbling or blistering on the surface near the bottom is a red flag
What to Do If You Find a Leak
If a fitting is leaking, there’s a chance you can stop it with a gentle tighten or Teflon tape. If the tank itself is leaking — from a rust hole or crack — that unit will need to be replaced.
Don’t attempt to patch up a leaking tank. It won’t hold, and it can be a safety hazard.
Tip #6 — Get a Professional Inspection Once Every 1–2 Years
There’s a lot you can do yourself. But a licensed plumber sees things an ordinary homeowner doesn’t.
An annual or biannual professional inspection will cover:
- Full system pressure check
- Gas line inspection (for gas heaters)
- Ventilation check to rule out carbon monoxide buildup
- Thermostat and heating element testing
- Complete anode rod and T&P valve assessment
- Checking for code compliance if your unit is older
According to the U.S. Department of Energy, water heating accounts for about 14–18% of your home’s energy use — making professional maintenance one of the smartest investments you can make.
Is It Worth the Cost?
A professional inspection of a water heater usually costs $80–$150. Installations of new water heaters cost $800–$2,500 depending on the type and complexity.
One inspection that catches a failing anode rod or a cracked dip tube could save you from a full replacement — and potentially thousands of dollars in water damage.
It’s one of the highest-return maintenance investments you can make as a homeowner.
Gas vs. Electric vs. Tankless: Does Maintenance Change?
Yes — slightly. Here’s a quick breakdown:
| Maintenance Task | Gas Tank | Electric Tank | Tankless |
|---|---|---|---|
| Flush sediment | ✅ Yearly | ✅ Yearly | ✅ Yearly (descale) |
| Check T&P valve | ✅ Every 6 months | ✅ Every 6 months | ✅ If equipped |
| Inspect anode rod | ✅ Every 1–3 years | ✅ Every 1–3 years | ❌ Most don’t have one |
| Check gas line/burner | ✅ Yes | ❌ N/A | ✅ If gas-powered |
| Inspect heating elements | ❌ N/A | ✅ Every 2 years | ❌ N/A |
| Professional service | ✅ Every 1–2 years | ✅ Every 1–2 years | ✅ Every year |
Tankless units are generally lower-maintenance, but they still require descaling at least once a year — more often if you’re in a hard-water area. Don’t assume they’re completely maintenance-free.
5 Signs Your Water Heater Is Crying for Help
Don’t wait until it breaks down completely. These signals mean something is wrong right now:
- Rusty or discolored hot water — a sign of tank corrosion or a dying anode rod
- Rumbling, banging, or popping noises — nearly always sediment buildup
- Hot water depletes faster than normal — sediment limiting tank capacity, or a malfunctioning heating element
- Water pooling at the foot of the unit — a leak that needs to be addressed immediately
- Sudden increase in energy bills — heater is running around the clock due to sediment or a faulty thermostat
If any of these signs apply, don’t wait for your scheduled check-up. Call a plumber.
Quick Water Heater Safety Checklist
Use this checklist every six months:
- [ ] T&P valve tested and functioning properly
- [ ] No leaks or moisture around the tank base
- [ ] No rust or corrosion visible on tank or fittings
- [ ] Water temperature set to 120°F
- [ ] Tank flushed in the last 12 months
- [ ] Anode rod checked in the last 1–3 years
- [ ] No flammable material within 3 feet of the heater
- [ ] Professional inspection scheduled or completed this year
Print this out and tape it near your water heater.
FAQs About Water Heater Maintenance
Q: If maintained, how long does a water heater last? With regular care, a traditional tank-style water heater will last 10–15 years. Tankless units can last 20+ years. Expect that lifespan to be much shorter without servicing.
Q: Can I flush my water heater myself, or do I need a plumber? Flushing a water heater safely is something most homeowners can do themselves. It’s a straightforward process. But if your unit is quite old or has never been flushed before, it’s a good idea to have a plumber do the initial flush.
Q: How do I tell whether my anode rod needs to be replaced? If your hot water has a sulfur or rotten-egg odor, or if you inspect the rod and find it thinner than half an inch in diameter, replace it. Most plumbers recommend inspecting it every one to three years.
Q: Is a dripping T&P valve a big deal? Yes. If the valve won’t stop dripping after testing, then it’s either worn out or your tank is constantly under too much pressure. Either way, a plumber needs to come take a look immediately.
Q: Does setting my temperature to 120°F really save money? Yes. For every 10°F reduction in water heater temperature, you save about 3–5% on your water heating costs. At 120°F instead of 140°F, that’s a significant difference over the course of a year.
Q: How can you prolong the lifespan of a tankless water heater? Descale it annually — or even more often if you have hard water. Check filters and clean the inlet screen once a year too. Getting a professional service done every one to two years ensures that everything is working smoothly.
Q: Should I turn off my water heater when I go on vacation? Yes. If possible, set it to “vacation mode.” If not, shut it off completely. There’s no reason to keep heating water nobody’s using. It conserves energy and reduces the chance of a failure while you are away.
Wrapping It All Up
A water heater is not the most glamorous appliance in your house. But it’s one of the hardest working — and one of the most expensive to replace when it fails.
The six water heater maintenance and care guide safety tips covered here aren’t complicated. You don’t need special training or fancy tools. All you need is a bit of consistency.
Flush the tank. Test the valve. Check the anode rod. Watch the temperature. Look for leaks. Get a professional inspection annually or biannually.
That’s it. That’s the whole playbook.
Do these things regularly, and your water heater will repay you with years — even decades — of reliable hot water. Skip them, and you’re gambling every single day.
Start with one task this week. Your future self (and your wallet) will be grateful.