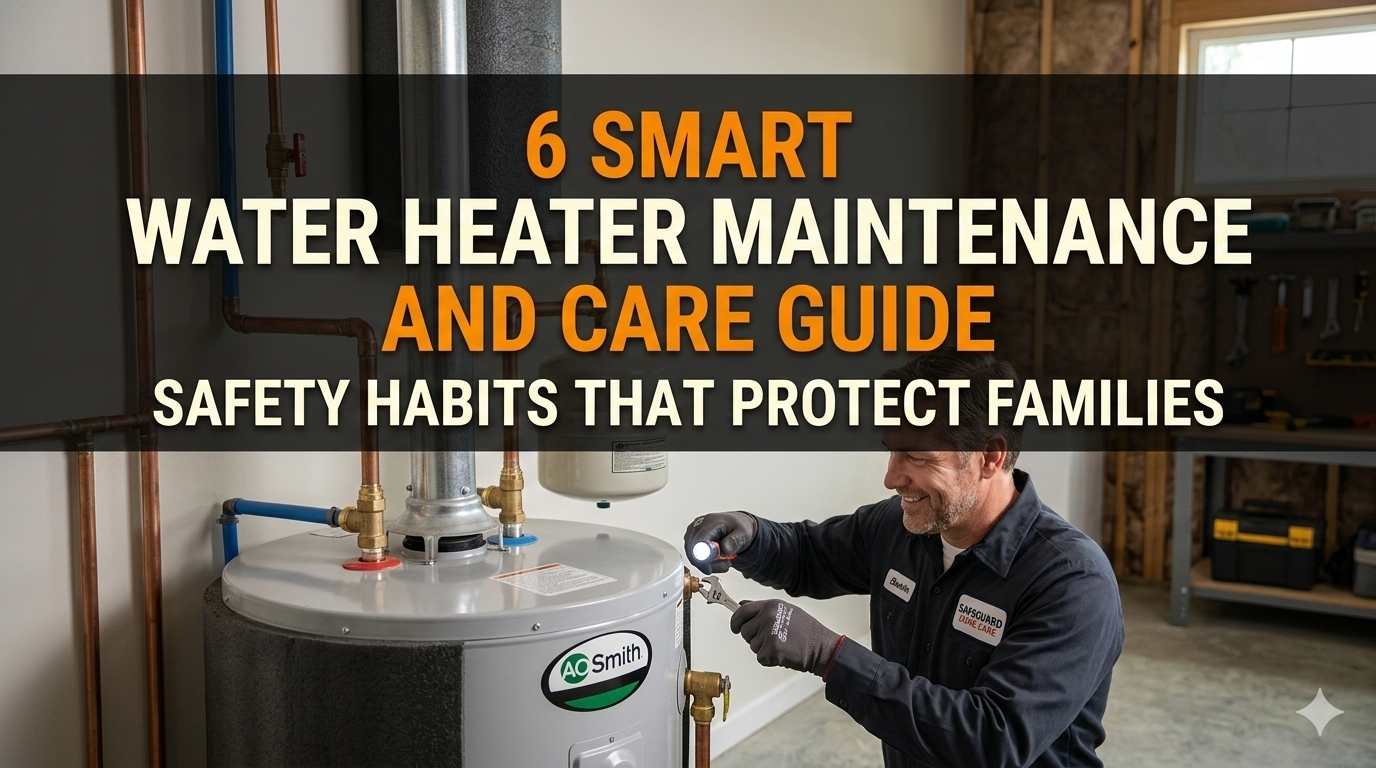
6 Smart Water Heater Maintenance and Care Guide Safety Habits That Protect Families
Meta Description: Water heater maintenance and care guide safety habits can save your family from burns, gas leaks, and costly repairs. Learn 6 smart habits every homeowner needs today.
Water Heater Maintenance and Care Guide: 6 Smart Safety Habits That Will Keep Families Safe
Your water heater gets a workout every single day. It heats the water for your showers, dishes, and laundry. But most families don’t think about it — until something goes wrong.
The dangers of an unattended water heater are real. We’re talking scorching hot water, natural gas leaks, flooding — even explosions. These aren’t scare tactics. These are real risks that affect real families every year.
The good news? Most of these dangers are wholly preventable.
A few simple habits will keep your water heater running safely and efficiently for years. This water heater maintenance and care guide will take you through 6 wise safety habits that protect your family and keep dollar bills in your pocket.
Let’s get into it.
Why You Should Care About Your Water Heater Safety
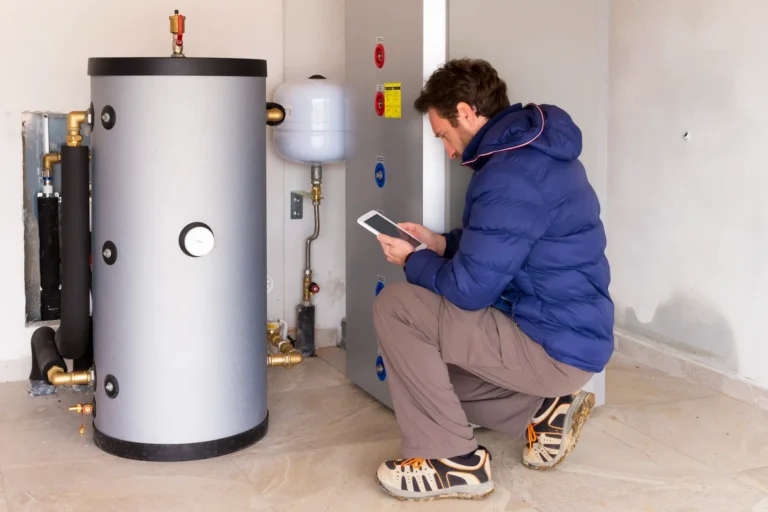
Few people give their water heater a second thought, treating it like a refrigerator — just plug it in and forget about it. But water heaters face a lot of stress, and all day every day it’s heat, minerals, and wear.
Water heaters are linked to thousands of home fires and injuries each year, according to the U.S. Fire Administration. Many of these incidents are due to poor maintenance or ignored warning signs.
Here’s a quick overview of the most common water heater hazards:
| Risk | Cause | Potential Harm |
|---|---|---|
| Scalding burns | Temperature set too high | Skin burns within seconds |
| Explosion | Pressure buildup | Severe property damage |
| Carbon monoxide leak | Faulty gas burner | Silent, deadly poisoning |
| Flooding | Corroded tank | Water damage, mold |
| Fire | Flammable materials nearby | Home fire |
| Legionella bacteria | Water temp too low | Serious lung infection |
All of these risks can be minimized with good maintenance habits. So let’s take them one by one.
Habit #1 — Start Off at the Right Temperature
The Safe Zone That Becomes the Sweet Spot
Here’s something most people don’t know: the temperature of your water heater matters. Too hot, and you’ll burn yourself badly. Too cold, and you turn the tank into a breeding ground for dangerous bacteria.
The U.S. Department of Energy suggests a water heater setting of 120°F (49°C). This is hot enough to kill the most common harmful bacteria but comfortable enough for routine use.
Some heaters default to 140°F. That may seem safer, but the opposite is true — particularly when young children and elderly family members are involved. It takes only a mere 5 seconds to suffer a third-degree burn at 140°F.
How to Check Your Temperature and What to Do With It
For electric water heaters:
- Kill power at the breaker
- Remove the access panel
- Make adjustments to the thermostat dial using a flathead screwdriver
- Set it to 120°F
For gas water heaters:
- Locate the thermostat dial at the bottom of the tank
- Twist it to the “Hot” or 120°F setting
- Most dials depict labels such as “Low,” “Hot,” and “Very Hot”
Test the temperature at your tap with a cooking thermometer. Run your hot water for 2 minutes, then try it. Tweak until you reach the magic number.
Family Tip: If you have a dishwasher without a booster heater, set your temperature to 130°F instead. But install anti-scald mixing valves at your faucets to prevent the tap water from getting too hot.
Habit #2 — Test the Pressure Relief Valve Each Year
A Small Valve That Averts Big Disasters
A Temperature and Pressure Relief (TPR) valve is inside every water heater. It is one of the critical safety features on the whole unit.
This valve opens automatically in case the pressure or temperature inside the tank rises to dangerous levels. If it wasn’t functioning correctly, the tank could rupture or even explode.
The scary part? Most homeowners have never tested theirs. Some TPR valves go years without being touched — and can corrode or freeze in a closed position. If the valve fails to work when you need it, you have a problem.
Testing Your TPR Valve Safely
It takes fewer than 5 minutes to test it. Here’s how:
- Shut the power or gas off to the heater
- Put a bucket under the discharge pipe leading from the valve
- Slightly lift the lever on the TPR valve
- You should be able to see (and hear) hot water or steam jet into the bucket
- Let go of the lever — it should spring back and halt the outflow
- If the water continues to drip or if the lever is stuck, call a plumber
Do this test once a year. Put it in your calendar so you remember.
When to Replace the TPR Valve
| Sign | What It Means |
|---|---|
| Water constantly drips after testing | Valve is worn out — replace it |
| Lever difficult to lift or stuck | Corrosion has set in |
| Valve is more than 5 years old | Time for a proactive replacement |
| You’ve never tested it | Replace it for peace of mind |
New TPR valves cost between $15–$40. It’s one of the least expensive insurance policies you’ll ever purchase.
Habit #3 — Flush the Tank to Combat Sediment Buildup
What’s Lurking at the Bottom of Your Tank
Here’s something most homeowners never think about. Every time water flows into your tank, it comes with tiny minerals — calcium, magnesium, and other deposits. As time goes by, those minerals sink down in the tank and create a thick layer of sediment.
This sediment causes real problems:
- Reduced efficiency — Your heater has to exert more effort to heat the water through the sediment layer
- Higher bills — You’re getting less hot water for more money
- Unusual sounds — Hissing and gurgling noises from your tank
- Shortened lifespan — Sediment speeds up corrosion of the tank
Flushing your water heater once a year can clear out this buildup and keep everything operating normally.
Step-by-Step Flushing Guide
What you’ll need:
- A garden hose
- A flat-head screwdriver
- Work gloves
- A safe place to drain the water
Steps:
- Turn off the power (electric) or set the gas knob to “Pilot”
- Attach a garden hose to the drain valve at the base of the tank
- Run the other end to a floor drain or outside
- Shut off the cold water supply to the heater
- Open a hot water faucet in your house to avoid a vacuum
- Open up the drain valve and let all the water out
- Reopen the cold water supply briefly to flush out any remaining sediment
- Close the drain valve, detach the hose, and refill the tank
- When the tank is full, turn the power or gas back on
Important: Draining water will be extremely hot. Take care and ensure children are kept away from the area.
How Often Should You Flush?
| Water Type in Your Area | Recommended Flush Frequency |
|---|---|
| Soft water | Once every 1–2 years |
| Moderately hard water | Once a year |
| Very hard water | Every 6 months |
Unsure what kind of water you have? Call your local water utility or purchase a basic home water test kit.
Habit #4 — Check the Anode Rod Before It’s Too Late
The Unsung Hero Inside Your Tank
This one throws a lot of people off. Inside your water heater tank, there is a metal rod called an anode rod (sometimes referred to as a sacrificial rod). It is generally constructed from magnesium or aluminum.
Its entire function is to corrode so your tank does not have to. In essence, it sacrifices itself to keep the steel walls of your water heater from rusting.
Once the anode rod is completely decayed, there’s nothing left to safeguard the tank. Rust consumes the walls, and basically your heater is done.
The good news is that replacing the anode rod is inexpensive and adds years to your tank’s life.
How to Check Your Anode Rod
The typical anode rod should be inspected every 2–3 years and replaced when it is less than half an inch thick or excessively calcium-coated.
Here’s how to check it:
- Shut off the water heater and cold water supply
- Open a hot water tap to relieve pressure
- Find the anode rod — typically on top of the tank under a plastic cap, or attached to the hot water outlet
- Use a 1-1/16 inch socket wrench to unscrew it
- Take the rod out and check it
What you’re looking for:
| Rod Condition | Action Required |
|---|---|
| Mostly intact, slight corrosion | Good — check again in 2 years |
| Less than ½ inch thick | Replace now |
| Heavily coated in white calcium | Replace now |
| Completely gone (just wire core) | Replace immediately — tank may already be damaged |
A replacement anode rod runs $20–$50. If you skip this step, you could end up having to replace your entire water heater years ahead of schedule.
Habit #5 — Keep the Space Around Your Heater Clear and Safe
Your Water Heater Needs Breathing Room
This may seem like a simple habit, but it is one of the most commonly overlooked safety protocols. Many families keep boxes, cleaning supplies, holiday decorations, or laundry supplies right next to their water heater.
That’s a serious safety problem.
Gas water heaters require proper airflow for safe combustion of fuel. With flammable materials stored close by, even a minor spark can ignite a fire. And if there’s a leak, fumes can accumulate fast in a cramped space.
Safety Zone Rules Every Family Must Follow
Keep at least 2 feet of clear space on all sides of your water heater. This ensures:
- Proper airflow for combustion
- Easy access for inspections and maintenance
- Reduced fire risk from flammable materials
Never store these near your water heater:
- Gasoline or paint cans
- Cleaning solvents or aerosol sprays
- Paper, cardboard, or fabric
- Propane tanks or gas canisters
Do store these nearby:
- A carbon monoxide detector (within 10 feet)
- A small fire extinguisher rated for Class B fires
- Your water heater’s manual
Carbon Monoxide: The Silent Danger
Gas water heaters create carbon monoxide (CO) as a combustion byproduct. Typically, this gas is safely vented outside through the flue pipe. But if the vent gets blocked or the burner fails, CO can escape into your home.
Carbon monoxide is colorless and odorless. You can’t see it, smell it, or taste it. And that is what makes it so deadly.
According to the Centers for Disease Control and Prevention (CDC), carbon monoxide poisoning sends more than 50,000 people to emergency rooms in the United States every year.
Signs of a CO leak:
- Headache, dizziness, or nausea when you are at home
- Black marks or soot around the heater
- Yellow or orange flame rather than blue
- Pilot light repeatedly going out
Have a CO detector installed on every floor of your house and within 10 feet of your water heater. Test it once a month and change the batteries once a year.
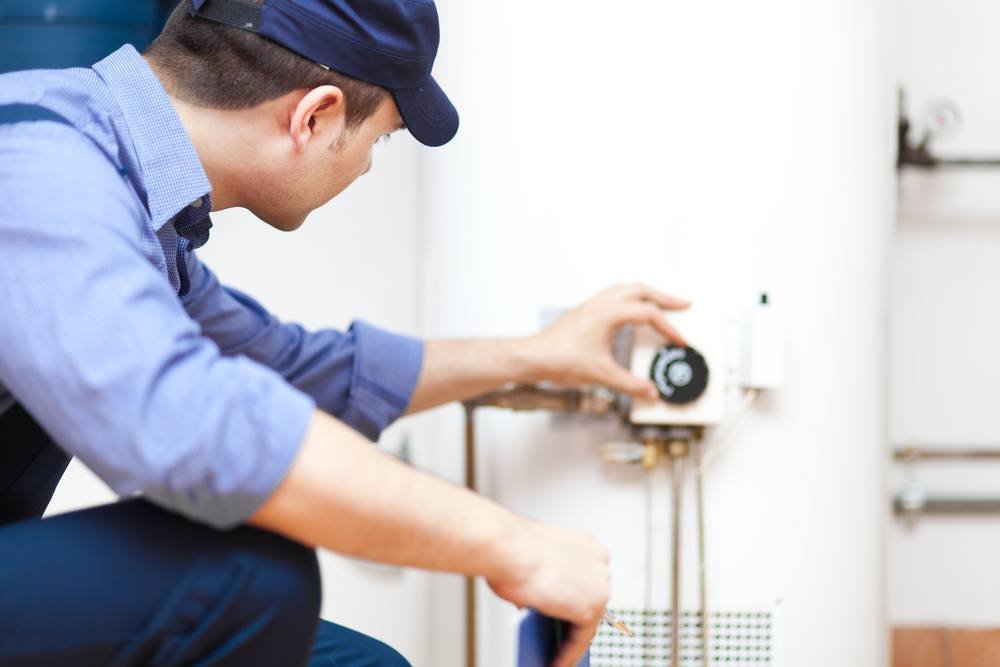
Habit #6 — Schedule a Professional Inspection Every 1–2 Years
Why DIY Isn’t Always Enough
Much of the water heater maintenance can be done yourself. But some things require a trained eye. A licensed plumber or HVAC technician can spot problems most homeowners would never see.
It’s kind of like taking a car in for inspection. You can do an oil change and check tire pressure yourself, but you still take the car to a mechanic for a full service. Your water heater deserves that same respect.
What a Professional Inspection Covers
A technician will inspect these components during a professional water heater inspection:
| Inspection Area | What They’re Looking For |
|---|---|
| Burner assembly (gas) | Flame color, complete combustion |
| Electrical connections | Loose wires, corrosion, proper grounding |
| Flue and venting | Obstructions, leaks, draft status |
| TPR valve | Functionality, discharge pipe angle |
| Anode rod | Condition of rod, remaining life |
| Connections and fittings | Rust, leaks, mineral deposits |
| Tank exterior | Cracks, bulges, spots of corrosion |
A professional inspection typically costs $80–$150. Compare that to the price of a new water heater ($500–$1,500 installed) or water damage repair ($1,000–$5,000+). It’s money very well spent.
How to Tell When It’s Time to Call a Pro Right Away
Don’t wait for your scheduled inspection if you notice these warning signs:
- Rusty or brown water coming from the hot tap
- Sounds of rumbling, popping, or banging coming from the tank
- Water pooling near the base of the heater
- Irregular water temperature (hot, then cold)
- The smell of rotten eggs (may indicate a gas leak or bacteria)
- A large spike in your energy bills with no good reason
Any one of these signs merits a phone call today — not next month.
A Year-Round Water Heater Maintenance Schedule
A plan makes it so much easier to stay on top of maintenance. Here’s a simple schedule you can follow:
| Task | Frequency |
|---|---|
| Check temperature setting | Every 6 months |
| Test the TPR valve | Once a year |
| Flush the tank | Once a year (or every 6 months for hard water) |
| Anode rod inspection | Every 2–3 years |
| Clear the safety zone around heater | Every 6 months |
| Test CO and smoke detectors | Monthly |
| Schedule professional inspection | Every 1–2 years |
| Replace anode rod (if deteriorating) | Every 3–5 years |
| Replace water heater (if aging) | Every 8–12 years |
Print this out and stick it on your water heater. Seriously — that small act alone could prevent a great disaster later on.
How Long Does a Water Heater Last?
Knowing your water heater’s age matters. Tank water heaters generally have a lifespan of 8–12 years. With proper care, tankless models may last up to 20 years.
The age of your heater can be found by checking the serial number on its label. The first few characters will generally tell you the month and year of manufacture. For decoding, go to the manufacturer’s website.
Once your heater is past its 10th birthday, start planning for a replacement — even if it appears to be operating just fine. Older tanks are much more prone to sudden failure, and that failure frequently comes with water damage and emergency plumber bills.
FAQs About Water Heater Maintenance and Safety
Q: How do I know if my water heater is failing?
Watch for rusty water, strange noises, leaking around the base of the tank, and inconsistent hot water. If your unit is more than 10 years old and displaying any of these signs, begin looking for a replacement.
Q: Is it possible to do water heater maintenance myself?
Yes, for certain tasks like a temperature check, flush, and TPR valve test. But for gas line work, electrical repairs, or anything involving the flue or venting, you should always hire a licensed professional.
Q: How are tank and tankless water heaters alike in terms of maintenance?
Tank heaters require flushing each year, checking the anode rod, and testing a TPR valve. Tankless heaters require annual descaling (especially important in hard water areas), filter cleaning, and burner or element checks. Both benefit from regular professional inspections.
Q: What does annual water heater maintenance cost?
DIY maintenance costs very little — just your time, and maybe $20–$50 in replacement parts like an anode rod. Professional inspections run $80–$150. All told, you’re looking at well under $200 a year to avert what could be a $1,000–$5,000 repair or replacement.
Q: Can I save on water heating costs by doing maintenance?
Absolutely. A clean, well-maintained water heater operates more efficiently. Efficiencies of 10–20% can be achieved through flushing out sediment alone. You can save even more by insulating your tank and pipes.
Q: My family has young kids, so what temperature should I set my water heater to?
Stay at 120°F. At that temperature, it takes approximately 5 minutes of exposure to get burned — compared with just 5 seconds at 140°F. You can also put anti-scald devices on faucets for additional protection.
Q: How can I tell if my anode rod needs replacing?
Pull it out and check. If it’s less than half an inch thick, covered with calcium deposits, or largely eaten away, replace it right away. Make a plan to check it every 2–3 years.
Wrapping It All Up
Your water heater is among the most hard-working appliances in your house. And for too long, it has been the most ignored.
But you’ve seen the risks. Scalding water, carbon monoxide, flooding, explosions — these are real hazards that hit real families. Preparation is often the only thing that separates a family that stays safe from one that ends up in trouble.
In this water heater maintenance and care guide you learned 6 smart, actionable habits:
- Set your temperature to 120°F
- Test your TPR valve annually
- Flush your tank to get rid of sediment
- Inspect and replace the anode rod
- Keep the area around your heater clear and install CO detectors
- Have a professional inspect every 1–2 years
None of these habits are hard to do. All of them take less than an hour. But combined, they can save you thousands of dollars in damage, protect your family from injury, and prolong the life of your water heater for years.
Start today. Choose one of these habits and do it this week. Then work your way through the rest. Every minute is worth it to keep your family safe.