9 Important Water Heater Maintenance and Care Guide Safety Rules You Should Follow
General Rules for Water Heater Maintenance and a Care Guide
Stick with these 9 time-tested tricks to avoid mishaps, conserve power, and keep your unit running longer.
You use your water heater every day, all day. Hot showers, clean dishes, warm laundry — all of it hinges on that one appliance operating in the background without a fuss. But most homeowners don’t think about it until something goes wrong.
That’s a big mistake.
An ignored water heater can leak, corrode, overheat, or even explode in extreme cases. It creeps up your energy bill without warning. It can breed bacteria in the tank that contaminate your water supply. None of that is fun to deal with.
The good news? Many of these issues are entirely avoidable. Your water heater maintenance and care can be as simple and consistent as any routine to keep your unit running safely for 10 to 15 years or more. You don’t have to be a plumber. You simply have to know what to look for, how frequently to do it, and when to enlist a professional.
In this guide, we walk you through 9 critical homeowner safety rules. These rules apply to you whether your heater is brand new or 10 years old.
Why Water Heater Maintenance Is Not Optional
Let’s start with the basics. Why should you care?
Here’s a snapshot of what deferred maintenance really costs:
| Problem | Potential Consequence | Average Cost to Fix |
|---|---|---|
| Sediment buildup | 30–40% drop in efficiency | $100–$300 flush |
| Corroded anode rod | Tank liner damage, leaks | $200–$700 replacement |
| Faulty T&P valve | Pressure explosion risk | $50–$200 valve swap |
| Ignored leaks | Floor damage, mold growth | $1,000–$4,000+ |
| Overheated tank | Scalding water, burns | Medical and repair costs |
As you might have guessed, neglecting maintenance doesn’t save money. It is more expensive in the long run — sometimes much more.
Tip #1 — Test Your Temperature and Pressure Relief Valve Annually
The Temperature and Pressure Relief valve — also known as the T&P valve — is among the most important safety features on your water heater. It releases pressure in case the tank overheats or builds too much internal pressure.
If this valve fails to open, pressure has no place to go. That’s how water heaters turn into very real risks.
How to Test It
Testing the T&P valve is straightforward:
- Place a bucket underneath the discharge pipe, right next to the valve.
- Quickly lift the lever on the valve — for 2 to 3 seconds only.
- You should see water and steam release from the pipe.
- Release the lever. The flow should stop completely.
If water continues dripping after you release it, the valve is defective. If nothing emerges when you lift it, the valve might be jammed or broken.
Either way, replace it immediately. A new T&P valve generally ranges in price from about $20 to $50; installation is straightforward for a licensed plumber.
How often: Test once a year. Replace every 3 to 5 years.
Rule #2 — Flush Your Tank to Remove Built-Up Sediment
As your water supply heats up over time, minerals — mostly calcium and magnesium — settle at the bottom of your water heater tank. That layer of sediment causes real problems.
It makes the heater work harder to heat your water, which means higher energy bills. It can also trap heat at the bottom of the tank, resulting in overheating, rumbling sounds, and accelerated wear.
Step-by-Step Flushing Process
- Shut the power (or gas) off to your water heater.
- Attach a garden hose to the drain valve near the bottom of the tank.
- Run the hose outside or to a floor drain.
- Open a hot-water faucet somewhere in your house to prevent a vacuum.
- Open the drain valve and flush until water runs clear.
- Close the drain valve, remove the hose, and refill the tank.
- Restore power or reignite the unit once it’s full.
The initial water that emerges may appear brown or sandy. That’s perfectly normal — it’s just the sediment flushing out.
How often: Flush once a year. Flush every 6 months if you have hard water.
Rule #3 — Inspect and Replace the Anode Rod
The anode rod is a metal rod — typically magnesium or aluminum — that hangs inside your water heater tank. Its purpose is to attract corrosive elements in your water so they attack the rod and not the tank lining.
Think of it as a sacrificial shield for your water heater.
Once the anode rod is completely corroded, it can no longer protect the tank. Corrosion then turns to the tank itself — and leaks and rust are likely to follow.
How to Inspect It
- Find the anode rod hex head — often on top of the heater or under a small plastic cap.
- Unscrew it with a 1 1/16-inch socket wrench.
- Pull it out and examine it.
| Anode Rod Condition | What It Means |
|---|---|
| Thick and intact | Healthy — nothing to do |
| Thin with calcium coating | Getting worn — check again in six months |
| Less than ½ inch thick | Replace at once |
| Fully consumed (wire visible) | Replace now — damage may have already started |
How often: Check every two to three years. Replace every 3 to 5 years, depending on your water quality.
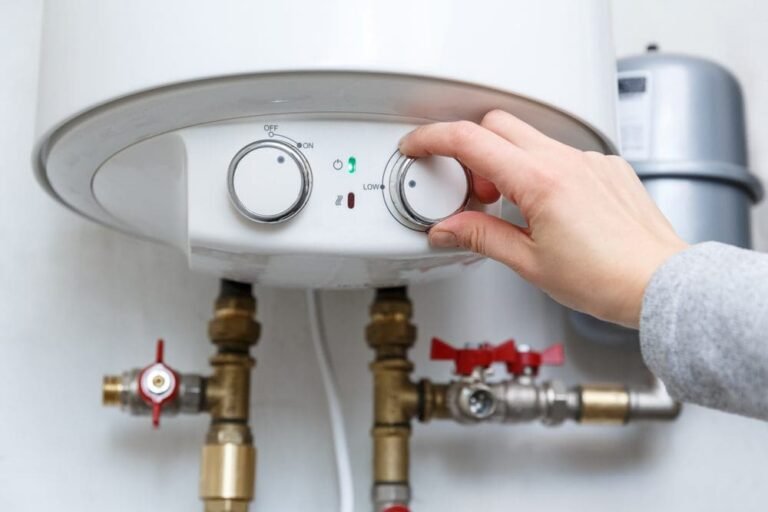
Rule #4 — Temperature Should Be No Greater Than 120°F
Most homeowners never touch their water heater’s temperature dial after installation. But the setting matters more than you might realize — for both safety and energy efficiency.
The Ideal Temperature Range
According to the U.S. Department of Energy, the ideal temperature setting for your water heater is 120°F (49°C). Here’s why that range makes sense:
- Under 120°F: Water may not be hot enough to kill harmful bacteria such as Legionella, the germ that causes Legionnaires’ disease.
- At 120°F: Bacteria are suppressed, and scalding is unlikely for most adults.
- Over 140°F: Scalding risk greatly increases — water at this temperature can cause third-degree burns in less than 5 seconds.
If you have small children, older relatives, or anyone with sensitive skin in your home, it’s even more important to stay at the 120°F mark.
How to Check the Temperature
Use a kitchen thermometer. Turn on the hot water at a sink for 2 to 3 minutes, then hold the thermometer under the stream. Compare the reading to the thermostat on the heater and adjust if needed.
Pro tip: If you’ll be away for a week or more, set your heater to its “vacation” setting or lower the temperature to save energy.
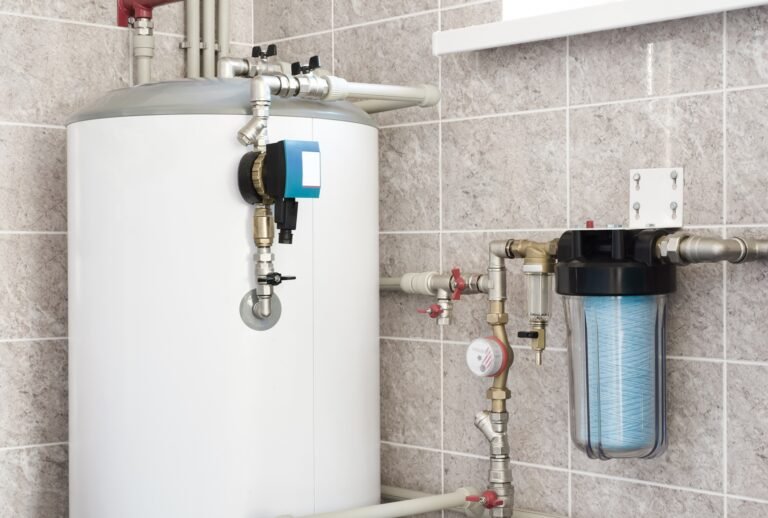
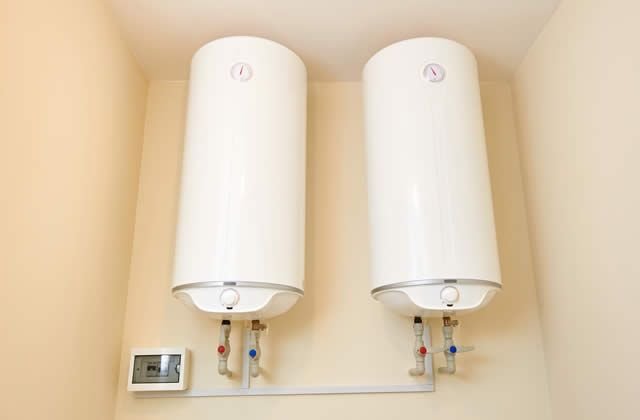
Rule #5 — Check for Leaks Around the Tank and Connections
A small leak from a water heater connection can become a major problem before you know it. Water damage is expensive. Mold is a health hazard. It’s better to catch leaks early than deal with the cleanup.
Where to Check
Develop a routine of examining these locations:
- Inlet and outlet pipes — Check for moisture, rust stains, or white mineral deposits.
- T&P valve discharge pipe — A pipe that constantly drips indicates a bad valve.
- Drain valve on bottom — Should be dry and sealed tight.
- The tank itself — Any moisture on the outside may indicate an internal crack.
A puddle under your water heater doesn’t necessarily mean there’s a leak — it could just be condensation. But don’t ignore it. Wipe it dry and check again the next day. If it comes back, investigate further.
How often: A quick visual check monthly. A full inspection every three months.
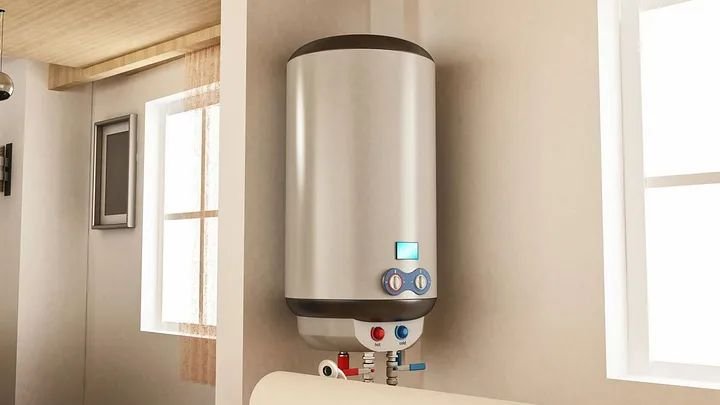
Rule #6 — Insulate Your Tank and Pipes to Save Money and Enhance Safety
Insulation isn’t only good for saving energy — although it does that quite effectively. It also reduces stress on your heater by minimizing heat loss, so the unit doesn’t cycle on and off as frequently. Fewer cycles means less wear on the components.
Tank Insulation
Older units — particularly those made before 2004 — typically have factory insulation that isn’t very efficient. The U.S. Department of Energy states that a water heater blanket can reduce standby heat loss by 25 to 45%.
Important: Do not cover the thermostat, the T&P valve, or the top of gas heaters. Always follow the manufacturer’s guidance.
Pipe Insulation
It’s also worth insulating the first 6 feet of hot and cold water pipes that run from your heater. Foam pipe insulation is inexpensive, easy to install, and significantly reduces heat loss.
Bonus safety fact: Insulated pipes help reduce the risk of burns if someone accidentally touches a hot pipe near the water heater.
Rule #7 — Give Your Water Heater Space and Ventilation
This one often gets overlooked. People store boxes, cleaning products, and miscellaneous household items next to their water heater. That’s an accident waiting to happen.
Clearance Requirements
For gas water heaters, ventilation is especially important. The unit requires ambient air for combustion. Without it, incomplete combustion can produce carbon monoxide — an odorless, colorless gas that is lethal in enclosed spaces.
Follow these basic clearance rules:
- Maintain at least 18 inches of clear space on all sides of the water heater.
- Never store flammable substances — paint, gasoline, solvents — anywhere near the unit.
- Ensure the flue or exhaust vent is not blocked, bent, or disconnected.
Ventilation is less of a concern for electric water heaters, but you’ll still want adequate clearance for access and airflow.
Carbon Monoxide Safety
If you own a gas water heater, place a carbon monoxide detector nearby. Test it every month. Replace it every 5 to 7 years.
That one step alone can save lives.
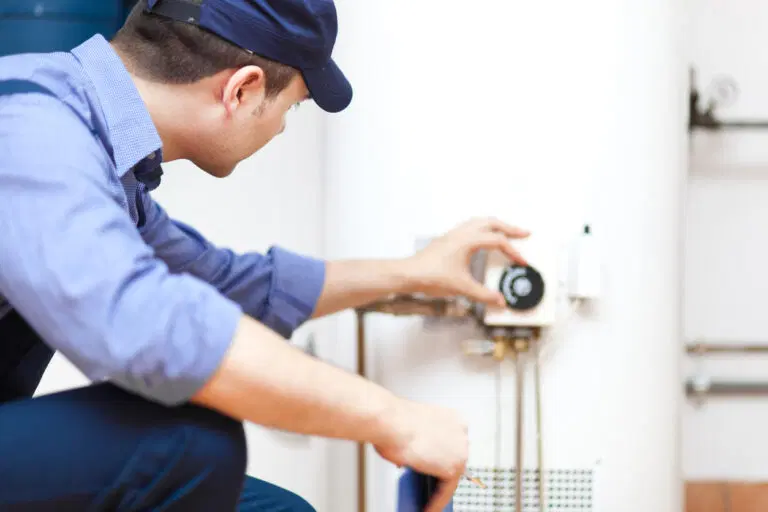
Rule #8 — Get a Regular Professional Inspection (Every 1–2 Years)
There’s a lot you can do on your own. However, some things require a trained eye and the proper tools.
A licensed plumber or HVAC technician can detect problems that the average homeowner will overlook — such as early signs of tank corrosion, burner issues in gas-powered heaters, electrical problems in electric units, and deteriorating seals or gaskets.
What a Pro Inspection Covers
| Inspection Item | DIY Possible? | Pro Recommended? |
|---|---|---|
| T&P valve test | ✅ Yes | ✅ Yes |
| Anode rod check | ✅ Yes | ✅ Yes |
| Sediment flush | ✅ Yes | ✅ Yes |
| Burner/flame check (gas) | ❌ No | ✅ Critical |
| Electrical connection check | ❌ No | ✅ Critical |
| Flue/venting inspection | ❌ No | ✅ Critical |
| Internal tank corrosion check | ❌ No | ✅ Critical |
Professional inspections are like getting your car serviced — common sense. You can check your tire pressure on your own, but you still bring it to a mechanic for a complete tune-up.
How often: Every one to two years. If your unit is older than 8 years, more frequently.
Rule #9 — Know When to Replace Your Water Heater
Regular upkeep extends a reliable water heater’s life. But no appliance lasts forever. Knowing when to retire your unit — instead of repairing it again — is an essential part of any water heater maintenance and care guide.
Key Warning Signs
Watch for these red flags:
- Age: Most water heaters have a lifespan of 8 to 12 years (tank style). If yours is nearing or past that range, start budgeting for a replacement.
- Rust-colored water: If hot water from your taps is orange or brown, the inside of your tank may be corroding. That rust can work its way into your water supply.
- Rumbling or banging noises: Loud sounds during heating typically indicate heavy sediment buildup that flushing can no longer resolve.
- Inconsistent hot water: If you’re running out of hot water faster than usual, your heater’s capacity is declining.
- Visible corrosion on the tank: Any rust spots or cracks on the outside of the tank are significant warning signs.
- Frequent repairs: If you’ve called a plumber for the same unit three or more times in the last two years, repair costs likely exceed the value of keeping it.
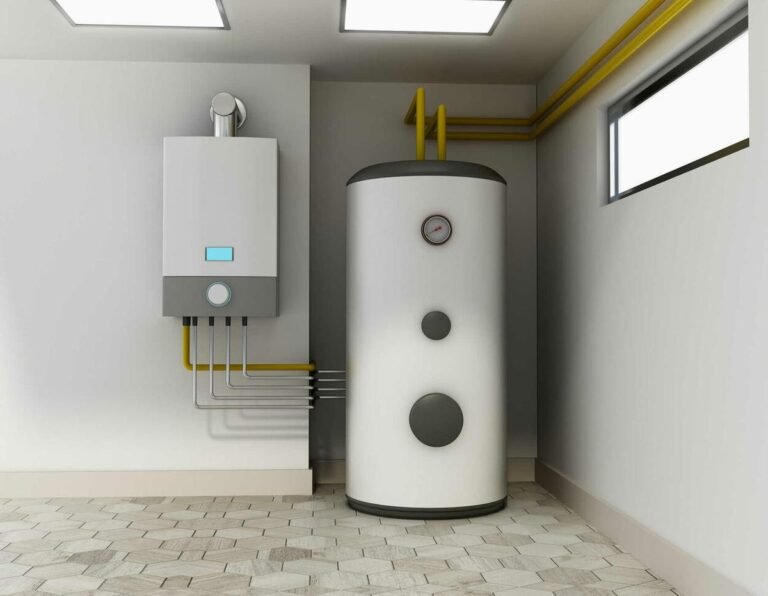
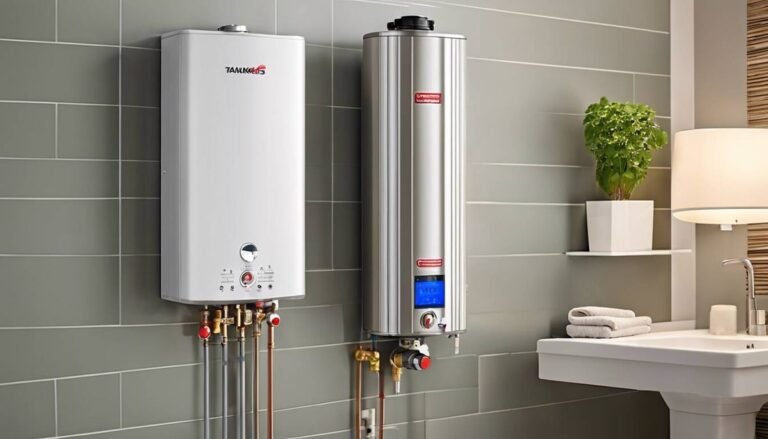
When to Upgrade
If you do need a replacement, consider upgrading to a tankless or heat pump water heater. These modern models are far more energy-efficient and can trim your water heating expenses by 30 to 50%.
Quick Reference: Annual Maintenance Checklist
| Task | Frequency | DIY or Pro? |
|---|---|---|
| Test T&P valve | Once a year | DIY |
| Flush sediment | Once a year (every 6 months with hard water) | DIY |
| Inspect anode rod | Every 2–3 years | DIY |
| Check temperature setting | Every 6 months | DIY |
| Inspect for leaks | Monthly | DIY |
| Check insulation | Every year | DIY |
| Clear surrounding area | Monthly | DIY |
| Professional inspection | Every 1 to 2 years | Pro |
| Full unit replacement | Every 8–12 years | Pro |
How Long Different Types of Water Heaters Last
| Type | Average Lifespan | Maintenance Intensity |
|---|---|---|
| Standard tank (gas) | 8–12 years | Moderate |
| Standard tank (electric) | 10–15 years | Low–Moderate |
| Tankless (gas) | 15–20 years | Moderate |
| Tankless (electric) | 15–20 years | Low |
| Heat pump water heater | 10–15 years | Moderate |
| Solar water heater | 15–20 years | High |
Good maintenance — particularly following a consistent water heater maintenance and care guide — can push these lifespans toward or beyond the upper end of these ranges.
Bringing It All Together — Establish a Maintenance Routine
The biggest mistake most homeowners make isn’t doing maintenance wrong — it’s not doing it at all.
Set a yearly reminder on your calendar for water heater service. Pick the same day each year — perhaps the start of spring or fall. Walk through the checklist. Test the valve. Check for leaks. Listen for odd noises.
It takes 30 minutes. It can save you thousands.
If you’re not comfortable doing any of the above, that’s perfectly fine. Bring in a plumber for a complete annual service. The price is usually well under $200 — a fraction of the cost of a failure or flood.
Your water heater serves you day in and day out. All it takes is a little routine attention to keep it running safely, efficiently, and reliably for years to come.
Frequently Asked Questions (FAQs)
Q1. How often should I flush my water heater? Flush your water heater at least every 12 months. For areas with heavy mineral content (hard water), flush every 6 months. Regular flushing prevents sediment buildup and keeps the unit functioning optimally.
Q2: At what temperature should I set my water heater? The recommended setting is 120°F (49°C). This is hot enough to keep bacteria from growing, but low enough to prevent scalding. Homes with young children or elderly residents should stay at 120°F or lower.
Q3: How can I tell if my anode rod is worn out? If your anode rod is less than half an inch thick or mostly deteriorated — leaving only the wire — it needs to be replaced immediately. Make it part of your routine water heater maintenance and care every 2 to 3 years.
Q4: My water heater is rumbling — is that normal? Not really. Rumbling or banging noises typically indicate a significant amount of sediment resting at the bottom of your tank. Flushing the tank often helps. If the noise persists after a flush, a professional inspection or unit replacement may be in order.
Q5: How long does a water heater last if properly maintained? A good-quality tank-style water heater usually has a lifespan of 10 to 15 years. Tankless models can last 15 to 20 years with regular maintenance. Neglecting maintenance shortens that lifespan considerably.
Q6: Do I need a plumber, or can I do water heater maintenance myself? Many tasks — such as testing the T&P valve, flushing the tank, and checking for leaks — are safe DIY jobs. However, anything involving gas lines, electrical connections, or internal components should always be performed by a licensed professional.
Q7: What are the signs that my water heater should be replaced? Look for rusty or discolored water, inconsistent hot water, rumbling noises, visible rust on the tank, or frequent repairs. If your unit is older than 10 years and shows any of these signs, replacing it often makes more sense than continuing to repair it.
Q8: Should I insulate my water heater? If your water heater is older and located in an unheated space — such as a garage or basement — wrapping the tank and pipes can help reduce heat loss and lower your energy bill. Newer models usually come with improved built-in insulation and may not require an additional blanket.
Final Thoughts
Caring for your water heater isn’t complicated. But it does require consistency.
This water heater maintenance and care guide gives you a clear, practical roadmap to follow. Test the safety valve. Flush the tank. Check the anode rod. Keep the temperature right. Look for leaks. Insulate when needed. Give it space to breathe. Get it professionally inspected. And know when it’s time to move on.
Nine rules. One goal: a reliable, safe, and efficient water heater.
Start with one task today. Build the habit over time. Your wallet — and your future self — will thank you.