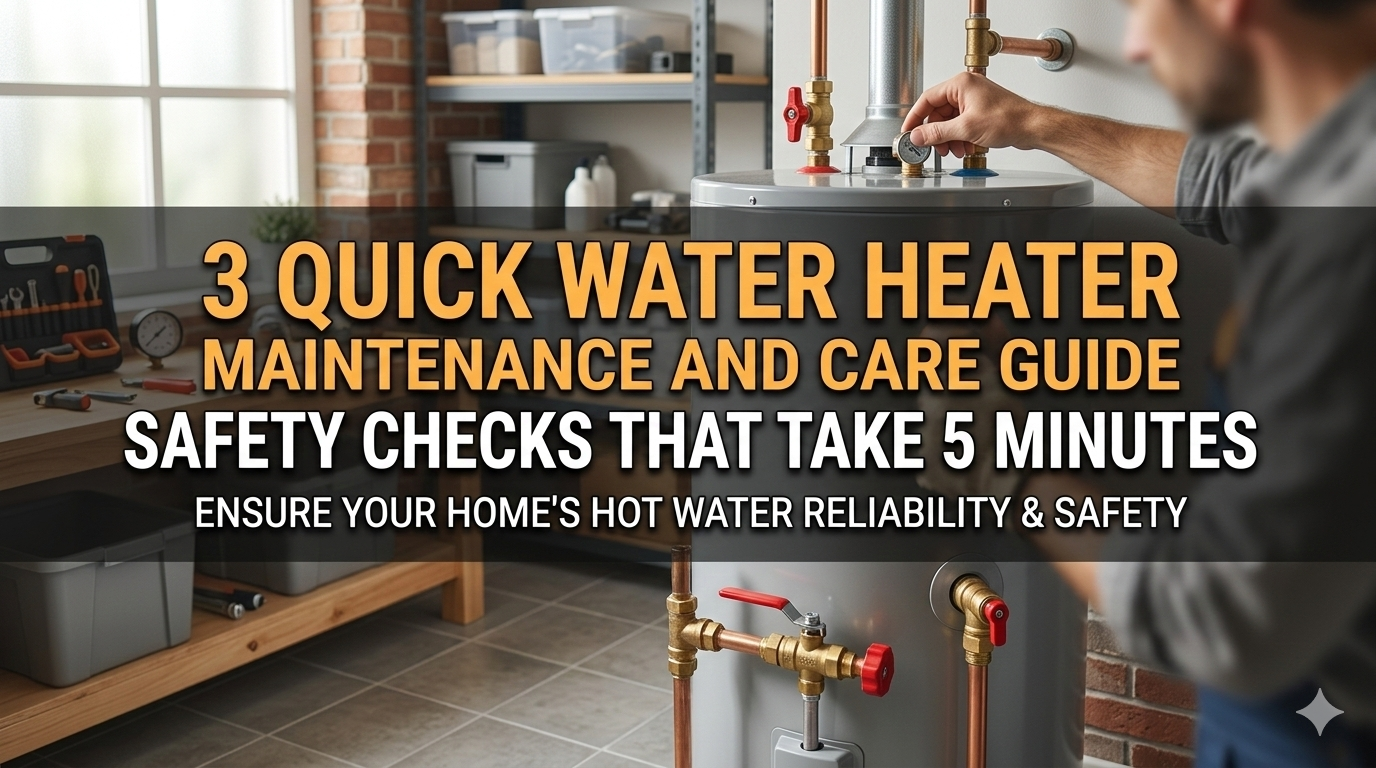
3 Quick Water Heater Maintenance and Care Guide Safety Checks That Take 5 Minutes
Meta Description: Maintenance and care guide on water heater safety checks in a few hours. Find out 3 quick checks (5 mins) that keep your water heater safe, efficient, and long-lasting.
3 Five-Minute Water Heater Safety Checks and Maintenance Tips
Your water heater does a lot of work every day. It heats water for your morning shower, to wash the dishes, for laundry — and you probably give it little thought until something goes wrong.
Here’s the thing: most water heater issues don’t occur overnight. They slowly accumulate over months and years. A little rust here. A bit of sediment there. A defective valve no one ever tested.
The good news? You don’t need to be a plumber to keep your water heater in top-notch condition. All it takes is five minutes and a little know-how.
This guide will take you through 3 easy water heater maintenance and care guide safety checks that literally take no time at all. Do these things regularly, and you will increase the longevity of your unit, reduce your energy bills, and stave off costly repairs.
Let’s get into it.
Why Water Heater Maintenance Gets Pushed to the Side (And Why That’s a Huge Error)
After it’s installed, most homeowners never touch their water heater. It resides in the basement or garage, humming along — until it doesn’t.
Water heating makes up about 18 percent of a home’s energy use, according to the U.S. Department of Energy. That’s the second biggest energy cost in most homes, after heating and cooling.
All water heaters labor harder than they should without proper maintenance. That means:
- Higher energy bills every month
- A reduced lifetime for the unit
- An increased chance of leaks, flooding, or worse — a dangerous buildup of pressure
Tank water heaters generally last 8 to 12 years with proper maintenance. Without it? You may be in the market for a replacement in five or six years.
Five minutes of your time a few times a year could help you save hundreds — even thousands — of dollars.
What You Need to Get Started
Before running these safety checks, you will need some basic items:
| Item | Why You Need It |
|---|---|
| Work gloves | Protects hands from hot surfaces |
| Bucket or towel | Catches water during the TPR valve test |
| Flashlight | Helps you see around the unit clearly |
| Your water heater manual | Helpful for model-specific info |
You don’t need any special tools for these checks. Everything here is designed to be performed safely by the average homeowner with no plumbing training.
One thing to do before you get started: know where the shutoff valve for your water heater is. If something goes wrong, you will want to shut off the water supply quickly.
Safety Check #1 — The Temperature and Pressure Relief (TPR) Valve
What’s the TPR Valve and Why Does It Matter?
The Temperature and Pressure Relief valve — also known as the TPR valve or T&P valve — is one of your water heater’s most crucial safety features.
Here’s what it does: if the temperature or pressure gets dangerously high inside your tank, the TPR valve opens automatically to let some of that pressure out. Without it, a water heater might actually explode.
No exaggeration. A TPR valve failure is a severe safety concern.
The bad news is most people never test this valve. Ever. TPR valves can also corrode, stick, or fail altogether — and you would never know it.
How to Check Your TPR Valve in Less Than 2 Minutes
The TPR valve is easy to test. Here’s exactly what to do:
Step 1: Find the TPR valve on the side or top of your water heater. It has a small lever or handle and typically has an attached pipe that goes downward.
Step 2: Put a bucket or towel underneath the discharge pipe. This catches the hot water that comes out.
Step 3: Slightly lift the lever — just a quick lift and release. You should hear a gurgling noise and see a small amount of water or steam emerge from the discharge pipe.
Step 4: Release the lever. The valve should return to its original position and stop releasing water.
If water continues to drip after you release the lever, then it’s time to replace the valve. If nothing comes out when you lift the lever, the valve may be stuck or defective.
In either case, call a licensed plumber if the valve doesn’t act as described above.
How Often Should You Test It?
The most common advice is to test your TPR valve once per year. Some even recommend every six months.
Write the date on a piece of tape and affix it to your water heater. That makes it easy to remember when you last tested it.
TPR Valve Quick Reference Chart
| Observation | What It Means | What to Do |
|---|---|---|
| Water comes out, then stops | Valve is functioning properly | No action required |
| Water continues dripping after test | Valve may be worn out | Replace the valve |
| No water or steam escapes | Valve may be stuck or failed | Call a plumber |
| Valve looks corroded or crusty | Old or degraded valve | Replace immediately |
Safety Check #2 — Clean Out Sediment From the Tank
The Sediment Problem Nobody Talks About
If you have a standard tank-style water heater, sediment is the enemy.
Minerals in your water supply — primarily calcium and magnesium — sink to the bottom of your tank over time. This sediment layer accumulates gradually, and most people don’t realize it’s happening.
Here’s why it’s a problem:
- Sediment acts as an insulator between the burner and the water. Your heater has to run longer and more often to heat the same amount of water.
- It makes a popping or rumbling noise when the heater runs — that’s sediment being heated along with the water.
- It accelerates corrosion within the tank, reducing its useful life.
- In more extreme situations, it can clog the drain valve or damage the tank lining.
Flushing your tank clears away this buildup, keeping your heater running clean and efficiently. For more expert tips on keeping your system in top shape, visit Water Heater Care — a dedicated resource for homeowners who want to get the most out of their water heater.
How to Flush Your Water Heater (The Easy Way)
You can perform a mini flush in 2 to 3 minutes. This is not a complete drain — it’s a quick sediment release that makes a real difference.
Step 1: Shut off the cold water supply to your heater. There’s likely a valve directly above the unit.
Step 2: Attach a garden hose to the drain valve at the bottom of the tank. Direct the hose to a floor drain, outside, or into a large bucket.
Step 3: Slowly open the drain valve. Let water flow until it runs clear. This typically only takes a minute or two.
Step 4: Close the drain valve, remove the hose, and turn the cold water supply back on.
Step 5: Wait a few minutes, then look for any drips around the drain valve.
That’s it. No special tools. You do not have to turn off power or gas to the heater for a quick flush.
Important: The water that comes out will be extremely hot. Be careful. Avoid letting children near this area while you’re performing the flush.
Full Flush vs. Mini Flush — What’s the Difference?
| Type | Time Needed | Frequency | Ideal For |
|---|---|---|---|
| Mini flush | 2–3 minutes | Every 3–4 months | Regular maintenance |
| Full flush | 20–30 minutes | Once a year | Heavy sediment buildup |
For most homeowners, a mini flush every few months will prevent sediment from becoming too big an issue. If you live in a hard water area, try to do full flushes more frequently.
Signs You Have a Sediment Problem Right Now
Unsure if sediment is a concern in your home? Watch for these warning signs:
- It takes longer than normal for your hot water to heat up
- Your water heater makes rumbling, popping, or banging noises
- Your energy bills increase without a clear reason
- Your hot water looks slightly cloudy or discolored
Any of these symptoms indicates it’s time to flush your tank — which may need to be done more than once.
Safety Check #3 — Check the Anode Rod
What Is an Anode Rod?
The anode rod is a long metal rod — typically made of magnesium or aluminum — that runs down the middle of your water heater tank.
Its job is to keep the steel tank from rusting. It does this through a process known as sacrificial corrosion. In simple terms, the anode rod corrodes so your tank doesn’t have to.
It’s one of the most critical components in your water heater, and it’s nearly always ignored.
Once the anode rod has fully corroded, rust sets in on the tank itself. Once rust has established itself, you’ll need to replace the entire water heater.
Regularly checking the anode rod and replacing it when necessary could add 3 to 5 years of life to your water heater. According to the U.S. Department of Energy, proper water heater maintenance is one of the most effective ways to improve efficiency and extend the lifespan of your unit.
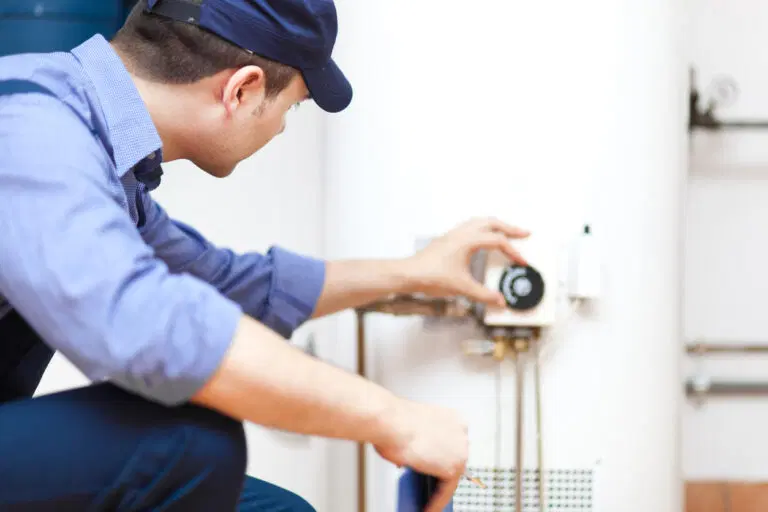
How to Check Your Anode Rod
This only takes about 2 minutes and requires a 1-1/16 inch socket wrench (or whatever size your manual indicates).
Step 1: Shut off the cold water supply and turn off the water heater (set it to “pilot” mode if gas, or turn off the circuit breaker if electric).
Step 2: Locate the anode rod access point. It’s typically on top of the tank — sometimes beneath a plastic cap, and sometimes it’s right there in plain sight.
Step 3: Unscrew the rod slowly using your socket wrench. It may take some effort if it hasn’t been removed in a long time.
Step 4: Pull the rod out and inspect it. A good rod looks solid and sturdy. A worn-out rod looks thin, brittle, crumbly, or is nearly gone.
Step 5: If the rod is less than half its original thickness, replace it. If it looks okay, apply Teflon tape to the threads and screw it back in.
Anode Rod Condition Guide
| Rod Appearance | Condition | Action |
|---|---|---|
| Solid, mostly intact | Good | Reinstall and recheck in 1–2 years |
| Some pitting, still has bulk | Fair | Plan to replace within 6 months |
| Thin, crumbly, or nearly gone | Poor | Replace immediately |
| Coated in calcium deposits | Hard water damage | Replace and consider a water softener |
How Often Should You Check It?
Inspect your anode rod every 2 to 3 years. If you live in an area with hard water or heavily treated municipal water, check it once a year.
Replacement rods range from about $20 to $50 — a modest price compared to a new water heater, which can cost $600 to $1,500 or more.
Putting It All Together — Your 5-Minute Maintenance Routine
Here’s how all three safety checks fit into a quick routine you can do a few times each year:
| Check | Time Needed | Frequency | Difficulty |
|---|---|---|---|
| TPR Valve Test | 1–2 minutes | Every 6–12 months | Very easy |
| Sediment Mini Flush | 2–3 minutes | Every 3–4 months | Easy |
| Anode Rod Inspection | 2–3 minutes (when due) | Every 2–3 years | Moderate |
You don’t need to do all three at the same time every visit. The TPR test and mini flush can be done together quickly. The anode rod check is a separate task you do less frequently.
The key is simply to do them consistently. Set reminders on your phone or calendar. Think of it like swapping out a smoke detector battery — a small job with big returns.
Bonus Tips for a Longer Life for Your Water Heater
Here are a few additional habits that make a real difference:
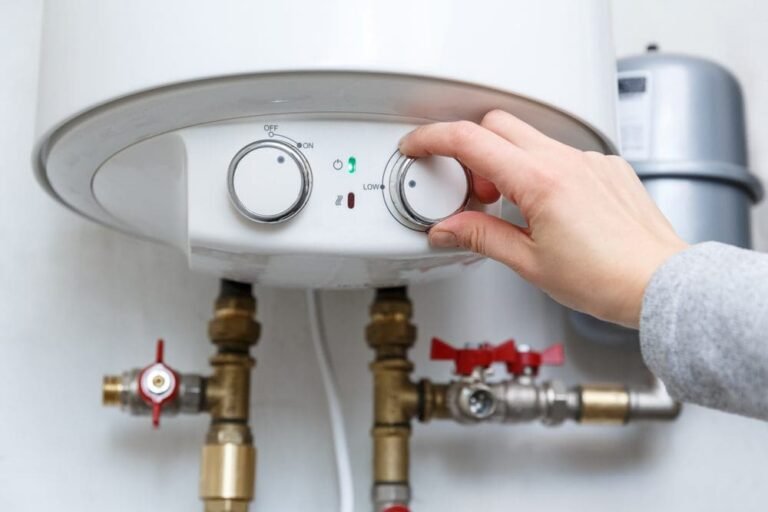
Check the temperature setting. The U.S. Department of Energy suggests keeping your water heater set to 120°F (49°C). Elevated temperatures raise the risk of scalding and speed up sediment accumulation. Lower settings reduce energy costs.
Look for leaks regularly. Glance at the base of your water heater once a month. Even a minor puddle can indicate an issue best caught early.
Insulate older tanks. If your water heater is older than 10 years and the outer shell feels warm to the touch, an insulating blanket can reduce heat loss and help lower energy bills.
Keep the area clear. Don’t store boxes, chemicals, or flammable materials near your water heater. This is both a safety issue and a maintenance one.
Know the age of your unit. Check the serial number on the label — the first two digits often indicate the year it was made. If your heater is nearing 10 years old, start budgeting for a replacement.
When to Call a Professional
These three safety checks are designed for the average homeowner. But there are situations when you should call a licensed plumber rather than attempt to fix something yourself.
Call a pro if:
- The TPR valve keeps dripping after the test and won’t stop
- You see rust-colored water coming from your hot water taps
- You smell gas near a gas water heater
- The tank is making loud banging noises that don’t stop after a flush
- The outside of the tank shows visible corrosion
- You’re not comfortable replacing the anode rod on your own
Some repairs seem straightforward but can quickly go wrong. When in doubt, call an expert.
FAQs — Water Heater Maintenance and Care Guide
Q: How often should I do a full maintenance check on the water heater? A: At least once a year, a full inspection — covering all three safety checks — is recommended. You can perform the sediment flush more frequently, especially if you have hard water.
Q: Can I perform these checks myself, or will I need a plumber? A: All three checks in this guide were created for homeowners with no plumbing experience. The TPR test and sediment flush are quite simple. The anode rod inspection is a little more involved, but still doable with basic tools. When in doubt, call a professional.
Q: What happens if I never flush my water heater? A: Sediment accumulates and makes your heater run harder, use more energy, and wear out sooner. In severe situations, it can significantly damage the tank lining and require a complete replacement.
Q: My TPR valve drips all the time — is that dangerous? A: Yes, a continuously dripping TPR valve is an indication that something is wrong. It could suggest the valve is faulty, or it could indicate dangerously high pressure or temperature inside the tank. Call a plumber right away.
Q: How can I tell whether my anode rod needs to be replaced? A: Take it out and inspect it. If it’s thin, crumbly, heavily pitted, or nearly eaten away, replace it immediately. A good rod will look solid and mostly intact.
Q: Does a tankless water heater require maintenance as well? A: Yes. Tankless water heaters don’t have the same sediment issues, but they still require annual descaling, filter cleaning, and venting checks. Check your owner’s manual for model-specific information.
Q: What temperature should my water heater be set to? A: The recommended setting is 120°F (49°C). This helps avoid scalding, slows mineral buildup, and keeps your energy bills reasonable.
Q: How long should a water heater last? A: A conventional tank water heater typically lasts 8 to 12 years with proper maintenance. Tankless models can last 20 years or more. Regular maintenance — including these three safety checks — can help your tank heater last toward the longer end of that range.
Conclusion — Little Effort, Huge Impact
Your water heater doesn’t ask for much.
It heats water day and night, year after year, without complaint. But like a car or an air conditioner, it requires periodic attention to keep operating safely and efficiently.
The three safety checks in this water heater maintenance and care guide — testing the TPR valve, flushing out sediment, and inspecting the anode rod — take less time than brewing a cup of coffee. Yet they can save your home from leaks, flooding, and unexpected cold showers.
Do them consistently. Keep a simple log of when you last completed each check. And don’t put it off just because everything seems fine right now. By the time problems are obvious, they’re already expensive.
Five minutes of maintenance today can mean years of dependable hot water tomorrow.