
6 Essential Water Heater Troubleshooting Tips That Work Fast
6 essential water heater troubleshooting tips that work fast
There’s something quietly frustrating about stepping into what you expect to be a warm shower, only to be greeted by a sudden blast of cold water. It’s the kind of everyday inconvenience that can instantly shift your mood. Water heaters are one of those household systems we rarely think about—until they stop doing their job. And when they do, it feels urgent.
The good news is that not every water heater problem requires a technician or expensive repairs. Many issues can be diagnosed and fixed quickly with a bit of patience, awareness, and a few simple tools. This guide walks you through six essential troubleshooting tips that are not only practical but also fast to apply. Along the way, you’ll also gain a better understanding of how your water heater works, which can help you prevent future issues.
Before diving in, it helps to pause and observe. Is the water completely cold, or just not as hot as it used to be? Is there a strange noise? A leak? A smell? These small clues often point directly to the root of the problem.
let’s start with the first and perhaps the most overlooked step
- check the power or fuel supply first
It may sound too simple, but you’d be surprised how often the issue is nothing more than a disrupted power or fuel source. Electric water heaters rely on consistent electricity, while gas heaters depend on a steady gas supply and a functioning pilot light.
For electric units, begin by checking the circuit breaker. A tripped breaker can instantly cut off power to the heater. If you find it switched off, reset it and wait a few minutes. If it trips again, that may signal a deeper electrical issue that needs attention.
Another quick check is the power switch itself. Some water heaters have a dedicated switch that can be accidentally turned off, especially in utility areas.
For gas heaters, inspect the pilot light. If it’s out, you’ll need to relight it following the manufacturer’s instructions. Usually, this involves turning the gas valve to the “pilot” position, pressing a button, and igniting the flame. If the pilot won’t stay lit, the thermocouple—a safety device—might be faulty.
There’s a small sense of satisfaction that comes from solving a problem this quickly. No tools, no costs—just awareness.
- adjust the thermostat settings
Sometimes the water heater is working just fine—it’s simply not set correctly.
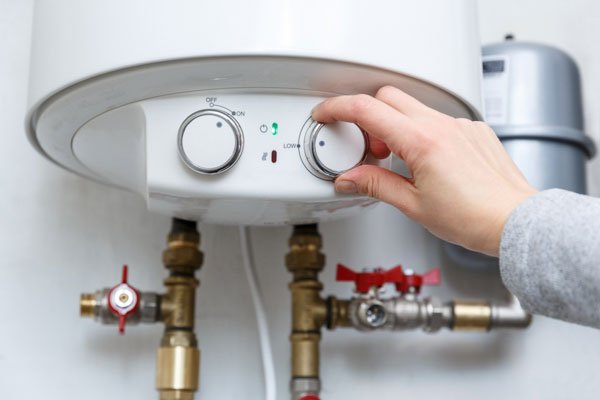
Most water heaters come with a thermostat that controls the water temperature. If the setting is too low, you’ll get lukewarm water instead of hot. This can happen accidentally, especially if someone adjusted it without realizing the impact.
For electric heaters, the thermostat is usually located behind a panel. You may need a screwdriver to access it. Inside, you’ll find a dial with temperature markings. A safe and comfortable setting is typically around 120°F (about 49°C).
Gas heaters often have an external knob with labels like “low,” “medium,” and “high.” Adjust it slightly and wait for a full heating cycle before testing the water again.
It’s important not to set the temperature too high. While hotter water might seem appealing, it increases the risk of scalding and can also lead to higher energy bills.
A small tweak here can make a noticeable difference—sometimes within minutes.
- flush the tank to remove sediment buildup
Over time, minerals in the water—especially in areas with hard water—settle at the bottom of the tank. This sediment forms a layer that can interfere with heating efficiency.
You might notice signs like popping or rumbling noises coming from the tank. That’s often the sound of water trying to push through the sediment layer.
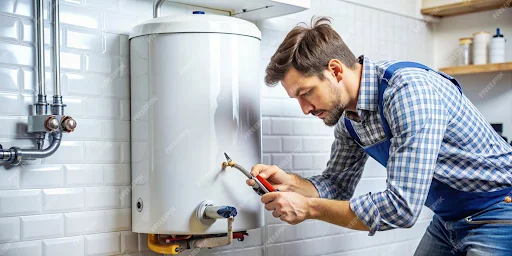
Flushing the tank is a straightforward process, though it does require a bit of care. Start by turning off the power (for electric heaters) or setting the gas valve to “pilot.” Then, shut off the cold water supply.
Attach a hose to the drain valve at the bottom of the tank and direct it to a safe drainage area. Open the valve and let the water flow out. You may see cloudy or gritty water at first—that’s the sediment being removed.
Once the tank is empty, briefly turn the cold water supply back on to stir up any remaining debris, then drain again. Close the valve, remove the hose, and refill the tank before restoring power or gas.
This process not only improves performance but can also extend the life of your heater. Think of it as giving your system a fresh start.
- inspect for leaks and loose connections
Leaks are often easy to spot but easy to ignore—until they become serious. Even a small drip can lead to water damage over time.
Begin by checking the area around the base of the heater. Look for puddles, damp spots, or corrosion. Then, examine the pipes and connections. Sometimes, a loose fitting is all it takes to cause a leak.
Tightening connections with a wrench can often solve the problem. However, be careful not to overtighten, as this can damage the threads.
If the leak appears to be coming from the tank itself, that’s more concerning. A cracked or corroded tank usually means replacement is the only solution.
Another component to check is the temperature and pressure relief (T&P) valve. This safety device releases water if pressure builds up inside the tank. If it’s leaking, it could indicate excessive pressure or a faulty valve.
Addressing leaks early is one of those small actions that can prevent big headaches later.
- test and reset the heating elements
Electric water heaters rely on one or two heating elements inside the tank. If one fails, you might still get some hot water—but not enough.
A common symptom is water that starts hot but quickly turns cold. This often means the lower element is not working properly.
To check this, you’ll need a multimeter. First, turn off the power to the heater. Then, remove the access panels and insulation to expose the elements.
Using the multimeter, test for continuity. If there’s no continuity, the element is faulty and needs replacement.
Replacing a heating element is relatively inexpensive and can be done with basic tools. It involves draining part of the tank, unscrewing the old element, and installing a new one.
After replacing it, refill the tank and restore power. The difference in performance can be immediate.
- listen for unusual noises and act quickly
Water heaters are usually quiet. So when they start making noise, it’s worth paying attention.
Different sounds can indicate different issues. A popping or crackling noise often points to sediment buildup, as mentioned earlier. A hissing sound might suggest a leak or pressure issue.
A high-pitched whining noise could be related to a partially closed valve or restricted water flow.
Instead of ignoring these sounds, treat them as early warnings. Investigating them promptly can help you catch problems before they escalate.
Sometimes, simply flushing the tank or adjusting a valve can restore quiet operation.
understanding the bigger picture
Troubleshooting is not just about fixing what’s broken—it’s about understanding why it broke in the first place. Water heaters operate under pressure, heat, and constant use. Over time, wear and tear are inevitable.
By paying attention to small changes—temperature fluctuations, noises, or minor leaks—you can stay ahead of major issues.
It also helps to build a simple maintenance routine. Checking the system every few months, flushing the tank annually, and inspecting components can go a long way.
There’s a certain confidence that comes from knowing you can handle these situations. It turns an unexpected problem into a manageable task.
a quick reflection on safety
While many troubleshooting steps are safe for homeowners, it’s important to know your limits. If you’re dealing with gas lines, major electrical issues, or significant leaks, it’s best to call a professional.
Safety should always come first. Turn off power or gas before working on the heater, and allow the water to cool to avoid burns.
Even experienced DIY enthusiasts know when to step back.
real-life scenario: a simple fix that saved the day
Imagine coming home after a long day, expecting a relaxing shower. Instead, the water is barely warm. Frustration sets in.
You check the thermostat—it’s set correctly. Then you look at the circuit breaker and notice it’s tripped. A quick reset, a short wait, and the heater is back in action.
No service call, no expense—just a few minutes of attention.
These are the moments where basic troubleshooting skills really pay off.
building confidence with each step
Each time you troubleshoot your water heater, you learn something new. Maybe it’s how to identify a heating element, or how to safely drain the tank.
Over time, these small lessons add up. What once felt intimidating becomes familiar.
And that familiarity reduces stress. Instead of worrying about what might be wrong, you approach the situation with curiosity and confidence.
common mistakes to avoid
While troubleshooting can be straightforward, there are a few pitfalls to watch out for.
Ignoring early warning signs is one. A small noise or slight temperature change might not seem urgent, but it can signal a developing issue.
Another mistake is skipping safety steps. Always turn off power or gas before working on the heater.
Using incorrect replacement parts can also cause problems. Make sure any components you install match the specifications of your unit.
Finally, avoid overcomplicating things. Start with the simplest checks—power, settings, and visible issues—before moving on to more involved steps.
when to consider replacement
Sometimes, troubleshooting reveals a bigger truth: the water heater has reached the end of its lifespan.
Most units last between 8 to 12 years. If yours is older and experiencing frequent issues, replacement might be more cost-effective than repeated repairs.
Signs that it’s time to replace include persistent leaks, rusty water, and inconsistent heating despite multiple fixes.
While replacement is a larger investment, it often brings improved efficiency and reliability.
closing thoughts
Water heater problems can feel urgent, but they’re often manageable with the right approach. By focusing on these six essential troubleshooting tips—checking power or fuel, adjusting the thermostat, flushing the tank, inspecting for leaks, testing heating elements, and listening for unusual noises—you can resolve many issues quickly.
More importantly, you gain a deeper understanding of a system that plays a crucial role in your daily comfort.
There’s something empowering about solving a problem with your own hands. It turns a moment of inconvenience into an opportunity to learn and grow.
And the next time the water runs cold, you’ll know exactly where to start.
frequently asked questions
- why is my water heater producing only lukewarm water
This is often due to a low thermostat setting or a partially failed heating element. Check the thermostat first, then inspect the elements if needed. - how often should i flush my water heater
Once a year is generally recommended. In areas with hard water, you may benefit from flushing it every 6 months. - is it safe to relight a gas water heater pilot light myself
Yes, as long as you follow the manufacturer’s instructions carefully. If you smell gas or feel unsure, contact a professional. - what causes strange noises in a water heater
Most noises are caused by sediment buildup at the bottom of the tank. Flushing the tank usually resolves this issue. - how do i know if a heating element is bad
You can test it with a multimeter for continuity. If there’s no continuity, the element needs replacement. - when should i call a professional instead of troubleshooting myself
If you’re dealing with gas leaks, major electrical issues, or persistent problems that don’t improve with basic fixes, it’s best to call a professional.
About the Author










