5 Powerful Water Heater Maintenance and Care Guide Safety Checks That Prevent Accidents
Meta Description: Water heater maintenance and care guide performing these safety check tips help to prevent accidents, extending your unit lifespan and keeping your home safe year-round.
5 Safety Checks for Your Water Heater Maintenance and Care That Prevent Accidents
Your water heater never makes any noise at all every day. It provides hot water for your showers, dishes and laundry without demanding much of your attention. But when did you last take a look at it?
Most homeowners don’t think about their water heater until something goes wrong. A leak. A strange noise. Or worse — a violent explosion from pressure buildup. The good news is, the majority of accidents are entirely avoidable.
This water heater maintenance and care guide takes you through 5 essential safety checks every homeowner should perform. These are easy, quick checks that could save your life — and your wallet.
Let’s get into it.
Water Heater Safety Is Not to Be Taken Lightly
Water heaters are under constant pressure — as in, literally. They handle high heat, water pressure and mineral buildup on a daily basis. That creates real risks over time.
Here’s what can happen when maintenance is ignored:
| Risk | Cause | Consequence |
|---|---|---|
| Explosion | Faulty pressure relief valve | Serious property damage or injury |
| Carbon monoxide leak | Poorly burning gas burners | Poisoning or death |
| Water damage | Corroded tank or leaking fittings | Flooding, mould, structural failure |
| Scalding burns | High thermostat setting | Severe skin burns |
| Premature unit failure | Sediment build-up | Costly premature replacement |
Failures of water heaters lead to thousands of injuries and millions in property damage every year, according to the U.S. Consumer Product Safety Commission. Regular maintenance drastically reduces these risks.
How Often Do You Need to Service Your Water Heater?
Before we get into the safety checks, here is a short maintenance schedule you should follow:
| Task | Frequency |
|---|---|
| Visual inspection | Monthly |
| Test pressure relief valve | Every 6 months |
| Flush sediment from tank | Once a year |
| Check anode rod | Every 2–3 years |
| Professional inspection | Every 3–5 years |
Let’s get into the 5 most powerful safety checks you need to make.
Safety Check #1 — Inspect Your Pressure Relief Valve (T&P Valve)
What Is the T&P Valve and Why Should You Care?
The temperature and pressure relief valve — known as the T&P valve — is your water heater’s most critical safety device. Its one job is to vent pressure if the tank gets too hot or develops too much pressure inside.
If it fails, pressure continues to build inside the tank. That is when things become dangerous pretty quickly.
A bad T&P valve could result in the tank bursting or exploding. This is not an exaggeration. It can be enough force to shoot a water heater through the roof of a building.
How to Check the T&P Valve: A Step-By-Step Guide
It takes less than 5 minutes to test this valve. Here’s how to do it safely:
What you’ll need: A bucket, safety gloves and eye protection.
- Power down the water heater (or switch to “pilot” mode if it’s gas).
- Find the T&P valve — it should be on the side or top of the tank with a metal lever and a discharge pipe.
- Put a bucket under the discharge pipe to catch water.
- Raise the lever slowly for 3–5 seconds.
- You should hear a whoosh as water or steam releases.
- Let go of the lever — it should return to the initial position and stop the flow.
If the valve fails to release water: It could be stuck or damaged.
If the valve leaks when you release it: It may need replacing.
When to Replace the T&P Valve
Replace the valve if:
- It doesn’t open when tested
- It keeps dripping after testing
- It’s more than 3 years old and has never been tested
- Rust or mineral buildup is visible around it
A new T&P valve normally sells for $10 to $30. A plumber can do it in less than an hour. It is one of the least expensive safety upgrades you can do.
Safety Check #2 — Examine the Anode Rod to Avoid Tank Corrosion
What the Anode Rod Really Does
Your water heater tank is steel. Steel and water don’t really mix — they make rust. To protect the tank, manufacturers place an anode rod inside — either magnesium or aluminum.
This rod has been designed as a wonderful piece of engineering. It sacrifices itself by getting eaten away first, pulling corrosive elements out of the steel tank walls. Without it, your tank corrodes from the inside.
When the anode rod has fully corroded, the tank itself becomes next. That’s when you start seeing rust-colored water, leaks and eventually tank failure.
How to Tell the Anode Rod Is Ready for Replacement
Be on the lookout for these red flags:
- Brown or reddish water from the hot tap
- Smell of sulfur or “rotten egg” from hot water
- The water heater is older than 4 years and the rod has never been changed
- Corrosion or scale on the outside of the tank
How to Inspect and Change the Anode Rod
What you will need: 1–1/16 inch socket wrench, plumber’s tape, replacement anode rod and a helper.
- Shut off the cold-water line and power to the heater.
- Open a hot water faucet nearby to relieve pressure.
- Find the anode rod — it’s typically under a plastic cap on top of the unit.
- Unscrew and remove the rod.
- Examine it carefully.
Anode Rod Condition Guide:
| Rod Condition | What It Means | Action Required |
|---|---|---|
| Thick, mostly intact | Still functioning | Check again in 1–2 years |
| Less than half an inch thick | Nearly depleted | Replace immediately |
| Coated with calcium | Hard water damage | Replace and consider installing a water softener |
| Completely missing | Tank at high risk of failure | Replace now, inspect interior tank |
The cost of anode rods depends on their size and material but is typically around $20–$50. Change it every 2–3 years, and you’ll double your water heater’s lifespan.
Safety Check #3 — Flush the Tank to Eliminate Hazardous Sediment
Sediment Formation Inside Your Tank
Each time cold water is supplied to your tank, it also transports tiny minerals — mainly calcium and magnesium. Over time, these minerals collect at the bottom of the tank to create a layer of sediment.
This sediment causes multiple problems:
- It causes the heating element to run overtime, wasting energy
- It creates a thermal hot spot at the bottom that can crack the tank lining
- It traps heat, causing overheating
- It makes loud popping or rumbling sounds when the heater operates
In hard-water areas, the sediment accumulates even more quickly. Loud banging or crackling noises coming from your water heater generally indicate that sediment has built up inside.
Step-by-Step Tank Flushing Guide
What you’ll need: A garden hose, a flat-head screwdriver, and a safe outdoor location for drainage.
- Switch off power (electric) or put gas to “pilot.”
- Attach a garden hose to the drain valve at the bottom of the tank.
- Guide the other end of the hose outside or to a floor drain.
- Shut off the cold water intake valve to the heater.
- Open a hot water faucet inside the home to relieve pressure.
- Open the drain valve — water will begin to flow.
- Run it until the water comes out clear (not milky or sandy).
- Shut the drain valve, restore cold water and allow the tank to refill.
- Once the tank is full, restore power.
Pro tip: When draining heavily sediment-clogged tanks, quickly open and close the cold water supply. This resuspends settled sediment and flushes it away more efficiently.
How Often to Flush Depending on Water Hardness
| Water Type | Flush Frequency |
|---|---|
| Soft water | Once a year |
| Moderately hard water | Every 6–9 months |
| Very hard water | Every 4–6 months |
Flushing your tank is free and only takes 30–45 minutes. Skipping it for years can cost you a $1,000+ replacement, though.
Safety Check #4 — Make Sure Your Thermostat Is Set Right to Prevent Scalding and Bacteria
How Improper Temperature Settings Could Be a Hazard
Most people set their water heater thermostat once and leave it alone. But the temperature setting is more important than most people know.
Too hot (above 140°F): Poses a scalding hazard. Hot water at 140°F can result in a third-degree burn within only 5 seconds. Young people and senior citizens are particularly susceptible.
Too cool (below 120°F): Presents a bacterial hazard. Water sitting at anything below 120°F is the ideal breeding ground for Legionella bacteria — the bacterium that causes Legionnaire’s disease, a deadly form of pneumonia.
What Temperature Is Actually Safe?
The U.S. Department of Energy, along with most plumbing experts, recommends 120°F (49°C) as the ideal setting. This temperature:
- Kills harmful bacteria effectively
- Reduces scalding risk significantly
- Reduces energy consumption by as much as 22% compared to 140°F settings
For someone in your home with a compromised immune system, your doctor might advise 140°F — but always do that alongside anti-scald mixing valves at faucets and showerheads.
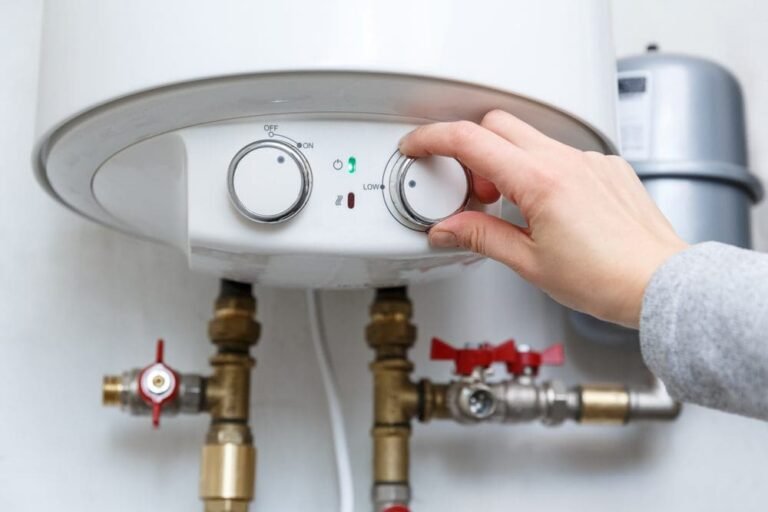
How to Inspect and Set Your Thermostat
For gas water heaters: The thermostat dial is positioned near the gas valve on the lower part of the device. Instead of actual degrees, it’s often labeled “Hot,” “A,” “B,” “C” or “Very Hot.”
Check actual water temperature with a cooking thermometer:
- Run hot water from a tap for 2–3 minutes until you get a steady flow.
- Fill a glass and insert the thermometer.
- Check the reading.
- If needed, adjust the dial and test again in one hour.
For electric water heaters: There are normally two thermostats — upper and lower — behind access panels on the tank. Adjust both to the same temperature with a flat-head screwdriver.
Temperature Quick Reference Chart:
| Setting | Temperature | Safe? |
|---|---|---|
| “Warm” or “Low” | ~90–100°F | Too low — bacteria risk |
| “Hot” or “Medium” | ~110–120°F | Good for most homes |
| “A” or “High” | ~130–140°F | Borderline — burn risk increases |
| “Very Hot” or “Max” | 150°F+ | Dangerous — scalding risk |
Safety Check #5 — Look for Leaks, Rust, and Gas Line Problems
Why Physical Inspections Save Lives
The final safety check is the one that most people miss because it’s so simple. Just look at your water heater. Really look at it.
A monthly visual inspection catches problems early — before they become emergencies. Rust, moisture and gas odors are visible or detectable without any special tools.
What to Check for During Your Inspection
Scrutinize these areas once a month:
1. The base of the tank Check for puddles, moisture or white mineral deposits. Even a slow drip can be a sign of bottom failure, a loose drain valve, or a leaking fitting.
2. The pipes and fittings Inspect the cold water inlet and hot water outlet pipes on top of the tank. Watch for green or white corrosion on copper pipes, and rust on steel ones. Using a wrench, tighten any loose connections — but don’t overtighten.
3. The pressure relief valve discharge pipe This pipe should be dry between tests. If you see water leaking from it without testing, the T&P valve might be relieving pressure too often — an indication that dangerous pressure is building up.
4. The flue pipe (gas heaters only) The flue carries combustion gases from the heater. Check for:
- Rust holes or gaps in the pipe
- Disconnected sections
- Obstructions from debris or bird nests
5. The burner area (gas heaters only) Look through the sight glass (a small window close to the base). The flame should be blue with a small yellow tip. An orange or yellow flame indicates incomplete combustion — a possible carbon monoxide hazard.
Signs of a Gas Leak — Take Action Immediately
If you smell rotten eggs or sulfur near your water heater:
- Do not turn on or off any electrical switches.
- Do not use your phone inside the house.
- Open windows immediately.
- Leave the house.
- Call your gas company from outside or at a neighbor’s home.
Never try to find a gas leak with a lighter or open flame.
Setting Up a Carbon Monoxide Detector
All homes with a gas appliance should have a carbon monoxide detector. Place one:
- Within 10 feet of the water heater
- On every sleeping floor of the home
- Near any gas appliances (furnace, stove, fireplace)
Carbon monoxide is colorless and odorless. You cannot detect it without a monitor. Detectors cost $20–$50 and are life-saving investments.

Bonus Tips to Extend Your Water Heater’s Life
In addition to the 5 basic safety checks, these habits ensure a longer and safer unit:
- Insulate your tank and pipes. A water heater blanket can cut heat loss by up to 45%. Pipe insulation prevents heat loss in the first lines of distribution.
- Keep a 2-foot clearance around the unit for ventilation and safe access.
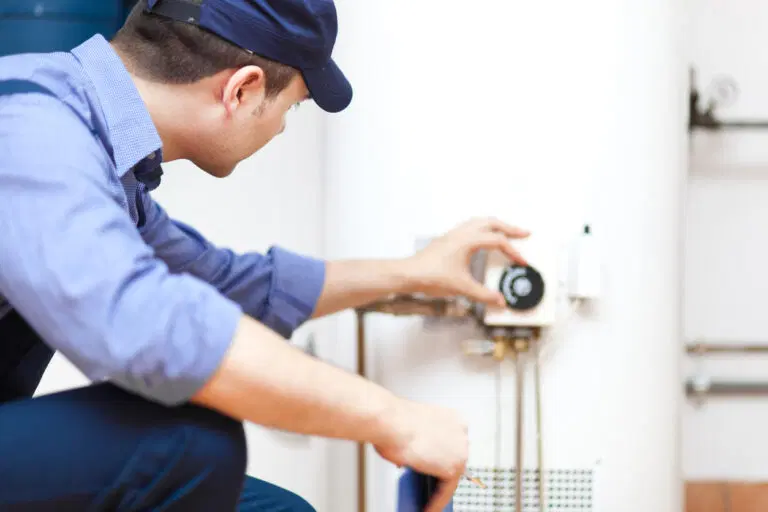
- Schedule a professional inspection every 3–5 years. A licensed plumber can identify problems that the untrained eye can’t see.
- Know your unit’s age. Check the serial number — most manufacturers embed the production year. Water heaters have a lifespan of about 8–12 years. If yours is older, begin preparing to replace it.
- Never store flammable materials near a gas water heater. Paint, gasoline and cleaning solvents can catch fire from the pilot light.
Water Heater Safety FAQ
Q: How can I tell if my water heater is about to fail? Keep an eye out for rusty water, rumbling or popping noises, pooling at the base and inconsistent hot water. All these signs indicate that your unit requires immediate service.
Q: Can I do these safety checks myself, or do I need a plumber? Most of these checks — testing the T&P valve, flushing the tank, checking the thermostat — are DIY-friendly. Gas line inspections and anode rod replacements may need to be handled by a professional if you’re not comfortable with the process.
Q: What is the average lifespan of a water heater? Tank water heaters typically have a lifespan of around 8–12 years. With the right maintenance, tankless models can last 15–20 years. Regular upkeep extends lifespan significantly.
Q: Is it normal for the T&P valve to drip a little? No. A properly functioning valve should only release water when tested. Constant dripping means the valve is worn out or that the tank pressure is consistently too high — both need to be fixed immediately.
Q: What can happen if I never flush my water heater? Sediment gathers and solidifies at the bottom of the tank. Eventually, it wears out the heating element, causes overheating and corrosion of the tank, and can destroy the whole unit. Skipping flushes significantly reduces your water heater’s life expectancy.
Q: Do water heaters actually explode? Yes — though it’s rare when the T&P valve is functioning as it should. The primary cause is a valve that cannot relieve pressure. This is why testing it every 6 months is so important.
Q: Should I shut off my water heater when going on vacation? Yes. Put it in “vacation mode” or the lowest setting. This conserves energy and lowers the chance of leaks or overheating when you’re not home.
Wrapping It All Up
Your water heater is among the hardest-working appliances in your home. It operates 365 days a year, often unnoticed — until something malfunctions.
These 5 safety checks from this water heater maintenance and care guide are not rocket science. They don’t need expensive tools or specialized training. But they do need a bit of care and attention a few times a year.
To recap:
- Test the T&P valve every 6 months — it’s your last line of defense against dangerous pressure.
- Check the anode rod every 2–3 years to keep the tank from corrosion.
- Flush the tank once a year to get rid of sediment that causes damage and wastes energy.
- Adjust the thermostat so water stays at a safe 120°F — protecting against both bacteria and burns.
- Do monthly visual inspections for leaks, rust and gas problems before they grow larger.
A few hours of maintenance a year can prevent serious accidents, prolong the life of your unit for years, and save thousands of dollars in repairs or replacements.
Don’t wait for an issue to remind you. Add these checks to your home maintenance calendar today.