12 Smart Water Heater Maintenance & Care Checks for Every Season
Last winter, I woke up at 6 AM, stepped into the shower, and got hit with a blast of ice-cold water. Not the “slightly cool” kind — the “am I being punished?” kind. Turned out my water heater had been silently struggling for months, and I had completely ignored the warning signs.
That morning cost me an emergency plumber visit, a $340 repair bill, and a very unpleasant start to my Tuesday.
The thing is, most water heater failures don’t happen suddenly. They build up over time — sediment accumulates, parts wear out, pressure valves get ignored. And the worst part? A lot of it is completely preventable if you just do a few simple checks throughout the year.
So whether you’ve got a tank-style unit that’s been humming in your basement for years or a shiny new tankless system, here’s a seasonal maintenance checklist I’ve personally put together — through trial, error, and one very cold shower.
1. Flush the Tank Every Season (Yes, Even in Spring)
Most homeowners flush their water heater once a year — if at all. But if you live in an area with hard water (which most of us do), sediment builds up faster than you’d think.
Here’s what I do quarterly:
- Turn off the power or gas supply to the heater
- Connect a garden hose to the drain valve at the bottom
- Run the other end outside or to a floor drain
- Open the valve and let it drain for 10–15 minutes
- Briefly open the cold water supply to stir up any remaining sediment
- Drain again, then close everything up and refill
The water that comes out is often brownish or gritty, especially the first couple of times. That stuff was sitting in your tank, slowly affecting heating efficiency and tank longevity.
Pro tip: Use a flashlight to check the color of water coming out. If it’s consistently clear after a few minutes, you’re in good shape.
2. Check the Anode Rod at Least Once a Year
This is the one maintenance task that most people have literally never heard of — and it’s probably the most important.
The anode rod is a metal rod (usually magnesium or aluminum) inside your tank that sacrifices itself to prevent rust. When it’s depleted, your tank starts corroding from the inside.
How to check it:
- Locate the hex head on top of your water heater (sometimes under a plastic cap)
- Use a 1 1/16″ socket wrench to unscrew it
- Pull it out and inspect it
If it’s thinner than a pencil or heavily crusted with calcium, replace it immediately. New rods cost $20–$40 and can add years to your tank’s life.
I ignored this check for three years on my first house. The tank rusted from the inside and had to be fully replaced at $900. Lesson learned the expensive way.
3. Test the Temperature and Pressure Relief (TPR) Valve — Every 6 Months
This little valve is a safety device. If pressure or temperature inside your tank gets too high, the TPR valve opens to release it. A failed TPR valve is a serious hazard.
Testing it is simple:
- Place a bucket under the discharge pipe
- Lift the lever on the valve briefly (just a second or two)
- Water should flow out, then stop when you release the lever
If no water flows, or water keeps flowing after you release it, the valve needs to be replaced. It’s a cheap fix — usually $15–$30 for the part. Don’t delay this one.
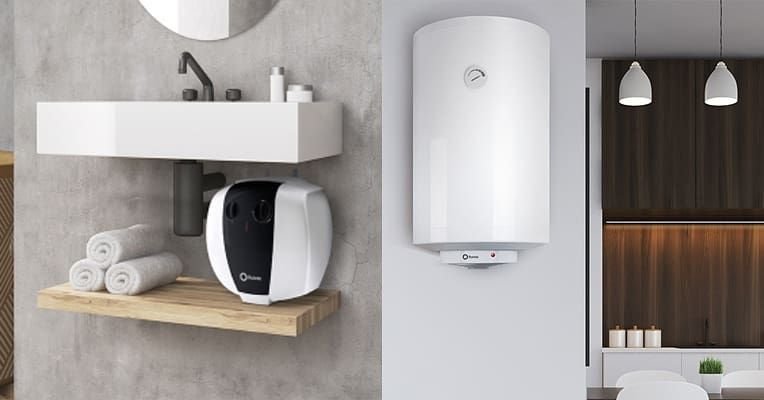
4. Inspect the Pressure Setting Seasonally
Water pressure in municipal systems can shift with seasons, especially in summer when demand spikes. Your water heater should operate between 120–150 PSI on the incoming supply side.
Pick up a pressure gauge (they screw onto any hose bib and cost about $10 at any hardware store). If pressure consistently runs above 80 PSI, consider installing a pressure reducing valve (PRV) on your main line. High pressure wears out your TPR valve, tank fittings, and even your appliances faster.
5. Dial In the Temperature — Especially Before Winter
The Department of Energy recommends setting your water heater to 120°F. It’s hot enough to kill bacteria, efficient enough to save on energy bills, and safe enough to reduce scalding risk.
But here’s the seasonal twist: in winter, incoming cold water is significantly colder. Your heater has to work harder to reach the same output temperature. A lot of people complain about “less hot water in winter” — but the real issue is the heater struggling against much colder inlet water.
What to do:
- In fall, bump your thermostat up slightly to 125–130°F
- Insulate the first few feet of cold water pipe entering the heater
- If you have an older unit, consider adding a timer so the heater pre-heats during off-peak hours
For those with tankless systems, check out 7 Smart Tankless Water Heater Care Tips That Save Energy — there’s a lot of overlap but also some really specific seasonal advice for on-demand units.
6. Insulate Your Tank and Pipes Before Cold Weather Hits
An uninsulated water heater sitting in a cold garage or basement is basically a heater working overtime to fight ambient temperature loss.
Adding a water heater insulation blanket (available for $20–$30 at Home Depot or Lowe’s) can reduce standby heat loss by 25–45%, according to the U.S. Department of Energy.
Step-by-step:
- Turn off the heater
- Wrap the blanket around the tank, leaving the top, controls, and TPR valve uncovered
- Tape it snugly with foil tape (don’t use regular tape — heat will loosen it)
- Also wrap exposed hot water pipes with foam pipe insulation
For gas heaters, leave the burner area and the top of the tank clear. For electric units, you can cover the top too.
7. Look for Leaks — Small Drips Become Big Problems
Every season, do a visual walk-around of your water heater. Check:
- The pressure relief valve discharge pipe (should be dry when not in use)
- All pipe connections (look for mineral deposits or rust stains — signs of past drips)
- The base of the tank (any moisture means internal corrosion or a seal failure)
- The drain valve (these get loose over time and can seep)
A small drip around a fitting is usually fixable with a wrench and some plumber’s tape. A wet spot at the base of the tank? That’s often a sign you’re shopping for a replacement soon.
I once noticed a tiny rust streak below my inlet pipe and dismissed it for two months. By the time I dealt with it, it had corroded the fitting significantly. A $5 fix became a $120 fix.
8. Clean the Burner Assembly (Gas Heaters) or Heating Elements (Electric) Annually
For gas heaters:
- Shut off the gas supply
- Remove the burner assembly panel
- Use a soft brush or compressed air to gently clean the burner ports
- Look for any signs of yellow or flickering flame (should be blue and steady)
For electric heaters:
- Turn off power at the breaker
- Remove the access panels
- Unscrew the heating elements (you’ll need an element wrench)
- Check for scale buildup and clean with white vinegar if needed
If your electric heater takes a long time to reheat or your gas unit makes a “poofing” sound when igniting, dirty components are often the culprit.
9. Check Venting and Air Supply (Gas Units) — Especially in Fall
Before heating season kicks in, inspect the flue and venting on your gas water heater. Blocked or leaky venting is dangerous — it can allow carbon monoxide to back-draft into your home.
What to check:
- Look at the vent pipe for corrosion, gaps, or disconnected sections
- Make sure nothing has fallen into the flue opening from above (leaves, bird nests)
- Ensure the draft hood on top of the heater sits properly
I always do this in early October before we close up the house for winter. One year I found a bird had nested right at the flue opening over summer. Scary to think about.
If you have any doubts about venting safety, this is one where calling a pro is absolutely worth it.
10. Check Your Water Quality — Adjust Maintenance Accordingly
Here’s something most maintenance guides skip: your water type changes how aggressively you need to maintain the heater.
| Water Type | Sediment Buildup | Anode Rod Life | Recommended Flush Frequency |
|---|---|---|---|
| Soft water | Low | Longer | Once a year |
| Moderately hard | Medium | Average | Every 6 months |
| Very hard water | High | Shorter | Every 3 months |
| Well water | High + iron | Much shorter | Every 2–3 months |
If you’re on well water or known hard water, you should also consider installing a whole-house water softener. It reduces scale in the tank, makes your anode rod last longer, and extends the life of every water-using appliance in your home.
I tested my water with a cheap home kit (TDS meter, about $12 on Amazon) and discovered my water was “very hard.” After installing a softener, my next tank flush had noticeably less sediment. Genuinely one of the best home investments I’ve made.
For more specific guidance on seasonal maintenance issues, 6 Essential Water Heater Maintenance and Care Guide Checks Before Winter walks through cold-weather prep in solid detail.
11. Review Your Energy Usage — Seasonal Spikes Are a Red Flag
Most smart thermostats and energy monitors (like the Sense Energy Monitor or even your utility app) can show you when your water heater is drawing more power than usual.
If your electricity or gas bill spikes in a season where usage shouldn’t be higher, your water heater might be:
- Running longer cycles due to sediment insulation (sediment acts like a heat barrier)
- Losing heat faster because of worn insulation
- Struggling with a failing heating element or burner
Track your average monthly cost for water heating. A 15–20% unexplained increase is worth investigating before you end up with a full failure.
Seasonal energy comparison guide:
| Season | Typical Efficiency Drain | Common Cause |
|---|---|---|
| Winter | High | Cold inlet water, more demand |
| Spring | Low | Mild temps, lower demand |
| Summer | Medium | Vacation use patterns |
| Fall | Medium-High | Transition + prep for winter |
12. Have a Professional Inspection Done — At Least Every Two Years
Look, DIY maintenance goes a long way. But there are things a licensed plumber or HVAC tech can catch that you genuinely can’t — like early-stage tank corrosion, gas valve issues, or failing thermostats that aren’t obvious from the outside.
I schedule a professional check every two years (or every year if the unit is over 8 years old). It usually costs $75–$150 and includes:
- Full system inspection
- Anode rod check and replacement if needed
- Thermostat calibration
- Venting safety check
- TPR valve test
Think of it like a car service. You can handle oil changes yourself, but you still want someone to put it on a lift occasionally.
The Mistakes I Still See Homeowners Make
Just to save you the grief:
- Ignoring the anode rod — Hands-down the most expensive mistake over time
- Skipping flushes because “the water looks fine” — Sediment is invisible in use, visible only on drain
- Setting temperature too high “just to be safe” — Over 130°F increases scalding risk and tank wear
- Not checking venting before winter — Carbon monoxide is odorless and deadly
- Waiting for problems to appear — Proactive maintenance is always cheaper than reactive repair
If you want to understand more about what goes wrong and why, 8 Proven Water Heater Maintenance and Care Guide Solutions That Actually Work covers common failure scenarios and real fixes that aren’t just “call a plumber.”
Quick Seasonal Checklist at a Glance
| Check | Spring | Summer | Fall | Winter |
|---|---|---|---|---|
| Flush the tank | ✅ | ✅ | ✅ | ✅ |
| Inspect anode rod | ✅ | — | ✅ | — |
| Test TPR valve | ✅ | — | ✅ | — |
| Check water pressure | ✅ | ✅ | ✅ | ✅ |
| Adjust temperature | — | — | ✅ | ✅ |
| Insulate tank/pipes | — | — | ✅ | — |
| Check for leaks | ✅ | ✅ | ✅ | ✅ |
| Clean burner/elements | ✅ | — | ✅ | — |
| Inspect gas venting | — | — | ✅ | — |
| Test water quality | ✅ | — | — | — |
| Review energy usage | ✅ | ✅ | ✅ | ✅ |
| Professional inspection | Every 2 years | — | — | — |
Maintaining your water heater isn’t glamorous. But neither is standing in a cold shower at 6 AM or writing a $900 check for a tank that could’ve lasted another five years.
Start with the basics — flush the tank, check the anode rod, test the TPR valve. Build from there. Most of this takes less than an hour per season and costs almost nothing compared to what it prevents.
Your future self (and your shower) will thank you.
Also worth reading: 10 Essential Water Heater Maintenance Tips That Extend Life — a solid companion guide if you want to go deeper on lifespan-focused care.
About the Author