

7 Smart Water Heater Troubleshooting Tips I Learned After a Breakdown
It was a Tuesday morning in January. I jumped into the shower, turned the handle, and stood there waiting for the warm water to kick in. It never did.
After about 90 seconds of cold water hitting my face, I realized something was genuinely wrong. My water heater — a 40-gallon gas unit that had been quietly doing its job for six years — had given up.
What followed was two days of frustration, a few embarrassing Google searches, one unnecessary plumber call (he showed up, looked at the pilot light for 30 seconds, and handed me a $95 invoice), and eventually — a working water heater I fixed myself.
That experience taught me more about water heaters than I ever wanted to know. And honestly? A lot of the problems people panic about are totally fixable at home, once you know what to look for.
Here are the 7 troubleshooting tips that actually made a difference for me.
1. Start With the Obvious Stuff (Seriously, Don’t Skip This)
I know it sounds embarrassing to say “check if it’s plugged in,” but hear me out — the number of times people (myself included) overlook the simplest issues is genuinely surprising.
Before you do anything else, run through this quick checklist:
- Gas heater? Check if the pilot light is out.
- Electric heater? Check the circuit breaker — it may have tripped.
- Both types: Check the thermostat setting. Someone might have bumped it down accidentally.
When my heater died, the first thing I assumed was a busted heating element or a gas line issue. Nope. The pilot light had gone out. Relighting it took literally three minutes using the instructions printed on the side of the unit.
I could’ve saved myself a lot of stress (and that $95 visit) if I’d started here.
Quick step-by-step for relighting a gas pilot light:
- Turn the gas valve to “OFF” and wait 5 minutes.
- Switch it to “PILOT.”
- Hold the pilot button down and use a long lighter to ignite the flame.
- Keep holding the button for 30–60 seconds after it lights.
- Turn the valve back to “ON.”
If it won’t stay lit — that’s a thermocouple issue. More on that in a bit.
2. No Hot Water at All? Your Thermostat or Heating Element Is the Culprit
If the pilot light (or breaker) is fine and you’re still getting cold water, the thermostat is your next stop.
On most tank water heaters, the thermostat is set somewhere between 110°F and 140°F from the factory. The sweet spot most plumbers recommend is around 120°F — hot enough to be useful, low enough to prevent scalding and reduce energy waste.
If you have an electric water heater, there are usually two heating elements — one at the top and one at the bottom. If the bottom one burns out, you’ll get some hot water but it’ll run out incredibly fast. If the top one dies, you may get no hot water at all.
How to test a heating element (electric heater):
- Turn off the power at the breaker.
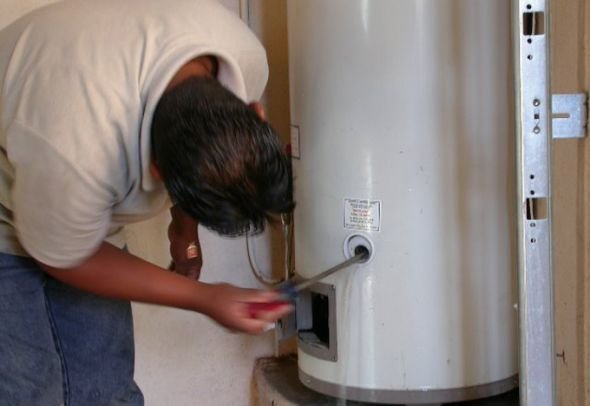
- Remove the access panel on the side of the tank.
- Use a multimeter (I use the Klein Tools MM400 — cheap, reliable) and test for continuity.
- A reading of 10–16 ohms is normal. No reading? The element is dead and needs replacing.
Replacement elements typically cost $15–$30 and the swap itself takes about 30–45 minutes. Watch one YouTube video on your specific model before attempting it — brands like Rheem and A.O. Smith have slightly different setups.
3. Rumbling or Popping Sounds Mean Sediment Has Built Up
If your water heater sounds like it’s trying to cook popcorn, that’s sediment — minerals and scale that settle at the bottom of the tank over time, especially if you have hard water.
I ignored this sound for almost a year before my breakdown. Huge mistake.
The sediment layer forces the heating element to work harder, reduces efficiency, and eventually causes overheating that can damage the tank lining.
The fix: flush the tank.
Here’s how I do it every 12 months now:
- Turn off the heater (gas to “pilot,” electric breaker off).
- Attach a garden hose to the drain valve at the bottom of the tank.
- Run the other end to a drain or outside.
- Open a hot water faucet somewhere in the house (this prevents a vacuum).
- Open the drain valve and let it run until the water runs clear.
- Close everything up, refill, then turn the heater back on.
It takes about 45 minutes and makes a noticeable difference in heating speed and energy use. You can check out more detail on this in 7 Proven Water Heater Flushing Tips for Better Heating.
4. Lukewarm Water That Runs Out Fast? Check the Dip Tube
This one stumped me for a while.
The dip tube is a plastic pipe inside the tank that pushes cold incoming water down to the bottom to be heated. If it cracks or breaks, cold water mixes with hot water at the top — and you end up with that frustrating “warm but not really hot” situation.
A failed dip tube is surprisingly common in heaters made between the mid-90s and early 2000s (there was actually a class action lawsuit over defective ones from that era). But they can fail in newer units too.
Signs your dip tube is broken:
- Hot water runs out faster than usual
- Water is consistently lukewarm, never actually hot
- You notice small plastic fragments in your faucet aerators or showerhead
Replacing a dip tube costs around $10–$20 in parts and takes maybe an hour. The hardest part is usually just getting the old one out — they can get stuck after years in the tank.
5. Water Around the Base of the Tank Isn’t Always a Leak (But Sometimes It Is)
When I saw water pooling under my tank after the breakdown, my stomach dropped. I assumed it was game over — total replacement time.
Turns out, it was condensation. During the winter, when the tank is working harder to heat cold incoming water, moisture can collect on the outside of the tank and drip down. Totally normal.
But sometimes it is a real leak. Here’s how to tell the difference:
| Situation | What It Likely Means |
|---|---|
| Water only appears in cold weather | Condensation — no action needed |
| Water near the pressure relief valve | PRV may be leaking or faulty |
| Water near the drain valve | Drain valve not fully closed or worn out |
| Water seeping from tank sides or bottom | Internal tank corrosion — likely needs replacement |
What to do:
- Dry the area completely and put dry paper towels around the base.
- Check again in a few hours.
- If the paper towels are wet and it’s not a cold day, trace the water back to the source.
The T&P (temperature and pressure) relief valve is the one you really need to pay attention to. If that’s leaking, it either means the valve itself is faulty (replaceable for $15–$25) or your tank pressure is dangerously high — which is a bigger issue that warrants a professional.
6. Smelly or Discolored Water Points to the Anode Rod
Okay, this one is probably the most overlooked maintenance item in the entire water heater world.
The anode rod is a magnesium or aluminum rod that hangs inside your tank. Its entire job is to corrode instead of the tank lining — essentially sacrificing itself so your tank doesn’t rust from the inside out.
When it finally corrodes away completely (usually every 3–5 years), the tank itself starts to rust. This is when you get:
- Reddish or brown-tinted water
- A rotten egg smell (from sulfur-reducing bacteria reacting with the depleted rod)
- Metallic taste in your hot water
I had the rotten egg smell issue last summer — not from my main tank, but from a small secondary electric heater in my garage. Pulling out the anode rod revealed it had basically completely dissolved.
How to check and replace it:
- Turn off power/gas and water supply.
- Locate the anode rod port — usually on top of the tank, sometimes under a plastic cap.
- Use a 1 1/16″ socket wrench to unscrew it (this often requires serious torque — brace the tank).
- Pull it out and inspect. If it’s less than ½ inch thick or heavily coated, replace it.
- Wrap the new rod’s threads in Teflon tape and screw it in.
This simple $20–$40 part can add years to your tank’s life. Most people never touch it. 5 Secret Water Heater Maintenance Tips Most People Ignore goes into more detail on this.
7. When the Thermocouple Is the Problem (Gas Heaters Only)
Remember back in tip #1, when I said “if it won’t stay lit, that’s a thermocouple issue”?
Here’s what that means.
The thermocouple is a small safety device that sits right next to the pilot flame. It detects heat — and as long as the pilot is burning, it tells the gas valve to stay open. If the pilot goes out for any reason, the thermocouple signals the valve to close and cut off gas flow. It’s a safety feature.
But thermocouples wear out. When they do, they stop correctly detecting the pilot flame — and the gas valve stays closed even when the pilot is lit. Result: pilot won’t stay on no matter what you do.
Signs of a failed thermocouple:
- Pilot lights but goes out within seconds of releasing the button
- You’ve relighted it multiple times and it keeps going out
- The pilot flame looks weak or yellow instead of blue
Thermocouples are cheap — usually $5 to $20 — and replacing one takes about 20–30 minutes. The tricky part is just accessing it without bumping other components. I’d suggest snapping a photo of the setup before you start disassembling anything.
The replacement steps:
- Turn the gas valve fully OFF.
- Disconnect the thermocouple from the gas valve (it screws off).
- Remove it from the bracket near the pilot burner.
- Install the new one in the same position.
- Reconnect to the gas valve, relight the pilot, and test.
I replaced mine about eight months after my big breakdown — the pilot had started acting up again. Total cost: $12 and 25 minutes. So worth it.
For more peace of mind around gas-related issues, take a look at 5 Powerful Water Heater Safety Checks That Prevent Accidents.
Common Mistakes People Make When Troubleshooting
Since I’ve been through this firsthand, let me save you from the stuff I did wrong:
❌ Cranking the thermostat way up hoping it’ll “fix” the cold water problem. This doesn’t help if the issue is a failed element or dip tube — and it’s a scalding hazard.
❌ Ignoring small leaks hoping they’ll go away. They won’t. A slow drip from a drain valve can usually be fixed with a $3 washer. Left alone, it causes floor damage or worse.
❌ Calling a plumber immediately without running through the basics. I know, I know — I literally did this. But if you spend 15 minutes on the basics first, you might avoid a service call entirely.
❌ Not checking the age of your unit before investing in repairs. Water heaters typically last 8–12 years. If yours is pushing 12 and the tank itself is leaking internally, repairs are usually throwing good money after bad.
A Quick Reference: Symptoms and Likely Causes
| Symptom | Most Likely Cause | DIY Fix? |
|---|---|---|
| No hot water (gas) | Pilot out, thermocouple | Yes |
| No hot water (electric) | Tripped breaker, dead element | Yes |
| Lukewarm water | Dip tube, thermostat setting | Yes |
| Runs out fast | Sediment buildup, heating element | Yes |
| Rumbling/popping | Sediment | Yes (flush tank) |
| Rotten egg smell | Anode rod depleted | Yes |
| Discolored water | Rust, anode rod | Partly |
| Leaking pressure valve | Faulty T&P valve, high pressure | Sometimes |
| Tank seeping from sides | Internal corrosion | No — replace tank |
Final Thoughts
Honestly, going through that breakdown was one of the more annoying home repair experiences I’ve had — mostly because it turned out to be so fixable. A relighting procedure I could’ve done in three minutes turned into a two-day cold shower situation because I didn’t know where to start.
Now I check the anode rod every couple of years, flush the tank once a year, and actually pay attention when the heater starts making weird noises. It takes maybe a few hours a year total, and my energy bills have been noticeably lower.
Water heaters are pretty simple machines once you get over the intimidation factor. Most problems have clear symptoms, clear causes, and clear fixes. You just need to know what to look for.
If you want to go deeper on keeping your unit running well long-term, this article is a solid next step: 10 Essential Water Heater Maintenance Tips That Extend Life
About the Author









