7 Proven Water Heater Maintenance and Care Guide Flushing Tips for Better Heating
Meta Description: Water heater maintenance and care guide flushing tips help extend your unit’s life, cut energy bills, and prevent costly breakdowns — here are 7 proven methods to keep it running perfectly.
7 Proven Water Heater Maintenance and Care Guide Flushing Tips for Better Heating
Hot water is one of those things you never think about — until you lose it. It only takes the shock of a cold shower on a winter morning to feel how much you rely on your water heater any given day.
The good news? With some routine maintenance, your water heater can last 10 to 15 years or longer. Most people never even give maintenance a thought, leading to paying more for energy, fewer hot showers — and big repairs down the road.
This step-by-step guide highlights 7 proven water heater maintenance and care guide flushing tips that work. They’re easy, practical and suited to beginners, whether you have a tank-style or a tankless unit.
Let’s get started.
Why Water Heater Maintenance Does Matter
Homeowners don’t often think about their water heater until something is wrong. That’s a costly mistake.
Over time, minerals — such as calcium and magnesium — accumulate in the tank. This buildup is called sediment. It sits at the very bottom of your tank and makes your heater work harder to heat up water above it.
The result? Higher gas or electricity bills. Less hot water. Strange popping or rumbling sounds. And eventually — a damaged unit.
Regular maintenance avoids all that. It keeps your heater working efficiently and prolongs its life by years.
Here’s a quick overview of what neglect could cost you:
| Issue Caused by Neglect | Estimated Cost |
|---|---|
| Buildup of sediment reducing performance | 10–25% higher energy bills |
| Anode rod replacement (delayed) | $200–$300 |
| Full tank replacement (premature failure) | $800–$1,500+ |
| Emergency plumbing call | $150–$400/hour |
| Water damage from leak | $1,000–$5,000+ |
That table tells the story clearly. A small maintenance today can save you a large sum of money in future.
Warning Signs: When Your Water Heater Needs Attention
Before we get into tips, it’s helpful to recognize warning signs. Your water heater will often give you clues before it fails completely.
Here are the red flags to look out for:
- Water takes a long time to heat up
- Your hot water runs out faster than it used to
- You’re hearing popping, rumbling or banging noises
- Your water appears rusty or has an unusual odor
- Your energy bills have increased inexplicably
- You see moisture or small puddles around the base of the unit
If you have noticed any of these, it’s time to take action. The tips below should help you tackle most of those issues head-on.
Tip #1 — Flush the Tank Once Per Year at a Minimum
This is one of the most important things you can do for your water heater. Flushing gets rid of the sediment that accumulates at the bottom of the tank.
Sediment consists of minerals that are naturally found in tap water. They eventually settle and become packed. A thick layer of sediment makes your heater work harder to simply keep the water warm.
How to Flush Your Water Heater: A Step-by-Step Guide
Flushing sounds scary, but it is really not that hard. Here’s how to do it safely:
What you’ll need:
- A garden hose
- Work gloves
- Flat-head screwdriver
- A safe drain area or bucket
Step 1: Turn off the power. For electric heaters, just flip the breaker. For gas heaters, set the dial to “pilot.”
Step 2: Attach a garden hose to the drain valve located at the bottom of the tank.
Step 3: Feed the other end of the hose to a floor drain, outside or into a bucket. Be careful — the water will be hot.
Step 4: Shut off the cold water supply valve at the top of the tank.
Step 5: Open a hot water faucet in your home. This stops a vacuum from forming in the tank.
Step 6: Open the drain valve and allow all the water to completely drain.
Step 7: After the tank is empty, briefly turn on the cold water supply again to flush out any remaining sediment. Repeat until the water runs clear.
Step 8: Close the drain valve, remove the hose and refill the tank before restoring power.
Pro Tip: Never turn the power back on until the tank is full. Heating an empty tank could destroy the heating element.
Tip #2 — Inspect and Replace the Anode Rod Every 3–5 Years
The anode rod is one of the most ignored components of a water heater. It’s a long metal rod — typically made of magnesium or aluminum — that hangs inside your tank.
Its job is to absorb corrosive elements in the water. It “sacrifices” itself so the tank walls don’t rust. That’s why it’s called a sacrificial anode rod.
Why This Rod Is So Important
Your tank begins to corrode on the inside without a functioning anode rod. Once the tank rusts through, it’s over — it can’t be repaired. You’ll need a full replacement.
An anode rod costs $20 to $50. The cost of a new water heater ranges from $800 to $1,500 or more. The math is easy.
How often to replace it:
- Standard water: every 3–5 years
- Softened water: every 2–3 years (soft water speeds up the depletion of the rod)
- If you use the heater heavily: check annually
To inspect it, find the hex head bolt on top of your water heater. You will need a 1 1/16-inch socket wrench to remove it. Replace the rod if it is less than half an inch thick or heavily corroded.
Tip #3 — Set the Temperature to the Right Level
Many homeowners unknowingly set their water heater temperature too high. The factory default is usually 140°F, but most households function well with 120°F.
What Temperature Should You Use?
120°F is the sweet spot for most homes. Here’s why:
- It’s hot enough to kill off most harmful bacteria
- It greatly lowers the potential for scalding
- It uses 6–10% less energy than running at 140°F
- It causes less stress on your tank and pipes
That said, there are cases where 140°F makes sense — for example, if someone in your household has a compromised immune system or if you have a dishwasher without its own internal heater.
| Temperature Setting | Energy Use | Scalding Risk | Best For |
|---|---|---|---|
| 110°F | Lowest | Very Low | Not recommended (bacteria risk) |
| 120°F | Moderate | Low | Most households |
| 130°F | Higher | Moderate | Some medical needs |
| 140°F | Highest | High | Immune-compromised individuals |
To make the adjustment, locate the temperature dial on your unit. With gas heaters, it is often on the gas valve. You may need to remove a panel on electric heaters to access the thermostat.
Tip #4 — Test the Pressure Relief Valve Every Year
The T&P valve — short for temperature and pressure relief valve — is a vital safety device. It automatically releases pressure if the tank overheats or builds up too much pressure inside.
If this valve fails, the pressure inside the tank can build to dangerous levels. In extreme cases, a malfunctioning T&P valve may cause a tank explosion.
Testing the T&P Valve: The Safe Way
Testing it takes less than two minutes.
Step 1: Place a small bucket beneath the discharge pipe connected to the valve.
Step 2: Quickly lift the test lever — just a second or two.
Step 3: Hot water should flow out and then stop cleanly when you release the lever.
If water continues to drip after you release it, the valve is defective. If nothing comes out at all, it may be stuck or clogged.
Replacement T&P valves cost $15 to $30 and are easy to swap out. If you’re not comfortable doing it yourself, a plumber can handle it quickly.
Safety Note: Always stand to the side when testing this valve. The water discharge can be very hot.
For more expert guidance on keeping your system safe and efficient, visit Water Heater Care — a trusted resource for homeowners looking to get the most out of their water heating systems.
Tip #5 — Insulate the Tank and Pipes for Better Efficiency
This tip doesn’t get as much attention as flushing, but it can make a significant difference in your energy bills.
Water heaters lose heat through the walls of the tank — especially older models. This is called standby heat loss. Your heater is forced to keep reheating the water just to maintain the set temperature.
Two Ways to Reduce Heat Loss
Option 1: Insulate the Tank
You can purchase a pre-cut water heater insulation blanket for $20 to $30. It wraps around the outside of the tank and reduces standby heat loss by 25–45%.
This works best on older tanks (10+ years) or tanks stored in unheated spaces like garages or basements.
Important: Don’t cover the T&P valve, the top of a gas heater, or the burner access panel. Follow the instructions carefully.
Option 2: Insulate the Hot Water Pipes
Foam pipe insulation is inexpensive — usually under $1 per foot. Wrapping the first 6 feet of hot water pipe leaving your heater reduces heat loss and delivers hot water to your faucets faster.
| Insulation Type | Cost | Heat Loss Reduction | DIY Friendly? |
|---|---|---|---|
| Tank blanket | $20–$30 | 25–45% | Yes |
| Pipe foam wrap | $1/foot | 15–25% | Yes |
| Professional spray foam | $200–$500 | Up to 60% | No |
Tip #6 — Check for Leaks and Corrosion Regularly
Small leaks and early-stage corrosion are easy to miss — until they become a major problem. A slow drip near a connection can eventually cause water damage to your floors, walls and foundation.
Make it a habit to visually inspect your water heater every month. It takes less than five minutes.
What to Look for During an Inspection
Check the base of the tank: Any moisture, rust stains or puddles are warning signs. A little condensation is normal in humid weather, but standing water is not.
Check the inlet and outlet connections: These are the pipes at the top of the tank. Look for white or green mineral buildup, which often signals a slow leak.
Check the drain valve: This is located at the bottom of the tank. It can develop slow drips over time. Tighten it slightly if needed — but don’t overtighten, as the valve can crack.
Check for rust on the tank body: Surface rust can sometimes be cleaned off. But rust coming from inside the tank — like reddish-brown water from your faucets — means the tank itself is corroding. That usually means replacement time.
According to the U.S. Department of Energy, water heating accounts for about 18% of your home’s energy use, making regular maintenance one of the most impactful steps you can take to lower utility costs.
Tip #7 — Know When to Call a Professional
DIY maintenance is great, but there are situations where you need a licensed plumber. Knowing the difference can save you from turning a small fix into a big disaster.
Jobs You Can Handle Yourself
- Annual flushing
- Checking the T&P valve
- Replacing the anode rod
- Adjusting the temperature
- Adding insulation
Jobs That Need a Pro
- Gas line repairs or adjustments
- Replacing the T&P valve discharge pipe
- Major leak repairs
- Replacing a heating element (electric heaters)
- Full unit installation or replacement
How to find a good plumber:
- Check reviews on Google or Yelp
- Look for licensed and insured contractors
- Get at least 2–3 quotes before agreeing to any work
- Ask if they offer a maintenance service plan
Hiring a pro once a year for a full inspection — usually $80 to $150 — is a smart investment that can add years to your heater’s life.
Water Heater Maintenance Schedule: A Quick Reference
Staying consistent is key. Here’s a simple schedule to follow:
| Task | Frequency | DIY or Pro? |
|---|---|---|
| Flush the tank | Once a year | DIY |
| Test the T&P valve | Once a year | DIY |
| Check anode rod | Every 2–3 years | DIY |
| Replace anode rod | Every 3–5 years | DIY or Pro |
| Inspect for leaks | Monthly | DIY |
| Check temperature setting | Every 6 months | DIY |
| Professional inspection | Once a year | Pro |
| Insulation check | Every 2 years | DIY |
Print this out and stick it somewhere visible — near the heater, on the fridge, or in a home maintenance binder.
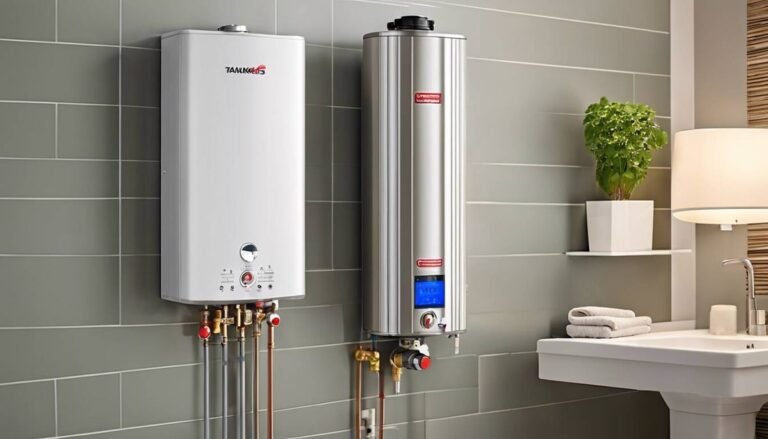
Tank vs. Tankless: Is the Maintenance the Same?
Great question. Many of these tips apply to standard tank-style water heaters. But tankless water heaters also have their own maintenance requirements.
Tankless Water Heater Maintenance Tips
Tankless heaters heat water on demand — so there’s no tank in the traditional sense to flush. But they still require routine care.
Descaling (flushing): The heat exchanger of tankless units also accumulates mineral deposits. You will need a descaling kit and food-grade white vinegar to flush the system. Most manufacturers recommend doing this once a year.
Clean the inlet filter: Tankless heaters have a small filter screen at the cold water inlet. Rinse it every 6 months to prevent flow restriction.
Look for error codes: Most newer tankless units have digital displays. Error codes can indicate everything from low gas pressure to ignition failure. Consult your manual for what each code means.
Annual professional servicing: Tankless units are more complex. Having a qualified technician visit once a year is also a good idea.
Common Water Heater Myths — Debunked
There is some terrible advice floating around on the internet. Let’s clear a few things up.
Myth 1: “If it’s working properly, I don’t have to maintain it.” Wrong. Most of the damage occurs quietly over time. Sediment builds up slowly. The anode rod depletes quietly. By the time you see a problem, it is often prohibitively expensive to fix.
Myth 2: “Flushing the tank can damage it.” Only if done incorrectly. Follow the steps in Tip #1 carefully and flushing is completely safe.
Myth 3: “Turning the temperature up higher means more hot water.” Not quite. Hot water capacity is determined by the size of the tank and its recovery rate — not just its temperature. Cranking the heat up wastes energy without really providing more usable hot water.
Myth 4: “Water heaters last forever.” The average lifespan is 8–12 years for tanks and 15–20 years for tankless units. With proper maintenance, these numbers can be higher, but no heater lasts indefinitely.
FAQs About Water Heater Maintenance
Q: How frequently should my water heater be flushed? Once a year is the standard recommendation. If you have hard water with high mineral content, flushing every 6 months is recommended.
Q: Can I flush my water heater without turning off the power? No. Power or gas should always be turned off first. Heating an exposed heating element in an empty tank can permanently damage it.
Q: How can I tell if my anode rod is bad? Pull it out and inspect it. Replace it immediately if it’s thinner than a pencil, heavily coated with calcium, or broken in sections.
Q: Is it normal to hear popping or rumbling from my water heater? Those sounds typically indicate that sediment has accumulated at the bottom of the tank. Flushing the tank should lessen or eliminate the noise.
Q: My water heater is 12 years old. Should I replace it or keep maintaining it? At 12 years, you’re past the average lifespan for a tank heater. Watch for rust, frequent repairs or efficiency drops. Start budgeting for a replacement — even if it still works.
Q: Can I do all this maintenance myself? Most of it, yes. Flushing, checking the T&P valve, replacing the anode rod and adjusting the temperature are all beginner-friendly tasks. Always leave gas line work and electrical repairs to a licensed pro.
Q: Does a water softener affect my water heater? Yes. Softened water is less corrosive to pipes, but it shortens the life of the anode rod. If you have a water softener, inspect your anode rod every 1–2 years rather than every 3–5.
Wrapping It All Up
Your water heater goes to work for you each and every day. It warms your showers, your dishes, your laundry — all with little in return requested.
But ignoring it has real consequences. Higher bills. Less hot water. Unexpected failures. Costly repairs.
These 7 water heater maintenance and care guide flushing tips give you everything you need to keep your unit running strong for years to come. From annual flushing to inspecting the anode rod, every step is simple, relatively inexpensive and well worth your time.
Start small. Do one thing this weekend — test the T&P valve or check for leaks. Build from there. Most items on the annual checklist can be completed within an hour.
A well-maintained water heater doesn’t just save money. It gives you peace of mind. And that is worth every ounce of effort.