5 Secret Water Heater Cleaning Tips That Saved Me Money
Last winter, my water heater started making this low, rumbling noise — kind of like a coffee percolator that had gone completely rogue. I ignored it for about two weeks (classic mistake), and then one morning I had lukewarm water at best. I called a plumber, braced for a big bill, and he looked at the tank for about 10 minutes before saying, “Sediment buildup. When did you last clean this thing?”
The answer was never. I had owned that water heater for four years and never once cleaned it.
The plumber charged me $180 for that visit, and the fix wasn’t even complicated. That afternoon I went down a rabbit hole learning everything I could about water heater maintenance — and what I found genuinely surprised me. Most of the cleaning work is stuff you can do yourself, it doesn’t take long, and it can save you a serious amount of money over time.
Here are the five cleaning tips I actually use now — the ones that made a real difference to my bills and kept that rumbling noise away for good.
1. Flush the Tank at Least Once a Year (Yes, Actually Do It) —
I know, I know — you’ve probably heard this before. But hearing about it and actually understanding why it matters are two different things.
Sediment — mostly calcium and magnesium minerals from your water supply — settles at the bottom of your tank over time. When that layer builds up, your burner has to work harder and longer to heat the water sitting above it. That directly translates to higher gas or electricity bills every single month.
Here’s how I do it now, step by step:
What you need: A garden hose, flat-head screwdriver, work gloves.
- Turn off the power (flip the breaker for electric heaters, or turn the gas knob to “pilot” for gas heaters).
- Connect your garden hose to the drain valve at the bottom of the tank.
- Run the other end of the hose to a drain or outside — the water coming out will be hot and dirty, so be careful.
- Turn off the cold water supply inlet at the top.
- Open a hot water faucet somewhere in your house (this prevents a vacuum from forming).
- Open the drain valve and let it empty.
- Once empty, turn the cold water supply back on briefly to flush out remaining sediment. You’ll see cloudy or brownish water at first — keep flushing until it runs clear.
- Close the drain valve, refill the tank, restore power.
The first time I did this, the water that came out looked like weak coffee. After that, my water heated noticeably faster and my monthly gas bill dropped by about $12–15. Doesn’t sound like a lot, but that’s $150+ a year just from one maintenance task.
Do this once a year — twice if you live in an area with hard water.
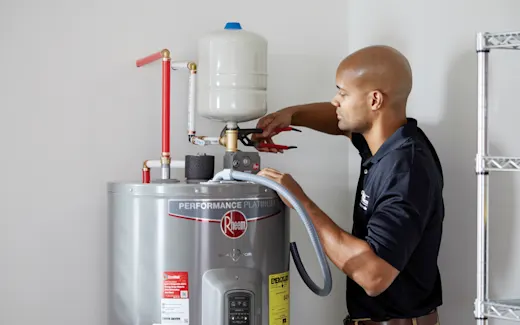
2. Clean the Anode Rod Before It’s Too Late —
This was the tip that genuinely felt like a secret to me. I had never heard of an anode rod until that plumber visit, and once I understood what it does, I was shocked more people don’t talk about it.
The anode rod is a long metal rod — usually magnesium or aluminum — that sits inside your water heater tank. Its whole job is to attract corrosive elements in the water and corrode itself so the tank walls don’t. It’s basically a sacrificial protector.
When the rod is completely corroded away, your tank starts rusting from the inside. And a rusting tank means leaks, bad-tasting water, and eventually a full replacement — which can cost $800 to $1,500 or more.
Checking and replacing the anode rod costs maybe $30–50 in parts if you do it yourself.
How to check it:
- Turn off power and water supply.
- Locate the anode rod — usually under a plastic cap on top of the heater, sometimes hidden under the sheet metal cover.
- Use a 1 1/16″ socket wrench (this was the specific size I needed for mine) to unscrew it.
- Pull it out carefully.
If the rod is less than half an inch thick, coated in white calcium, or has sections that are completely gone — replace it immediately.
I check mine every two years now. My tank is seven years old and still in great shape. Before I started doing this, I was on track to need a full replacement by now according to the plumber’s estimate.
For those with tankless heaters, this tip doesn’t apply directly — but check out 7 Smart Tankless Water Heater Care Tips That Save Energy for the equivalent maintenance steps.
3. Descale the Heating Element (Electric Heater Owners, This One’s for You) —
If you have an electric water heater, your heating elements can get coated with a thick layer of limescale — especially if your local water is hard. This coating acts like insulation, but not the good kind. It forces the element to use more electricity to produce the same amount of heat.
I didn’t realize this was happening to mine until I noticed my electric bill creeping up over several months with no obvious reason. Turned out the lower heating element was almost completely scaled over.
Here’s what I do now every 18 months or so:
- Turn off the breaker and let the water cool (seriously, don’t skip this — heating elements are live and the water is scalding).
- Drain the tank as described above.
- Use a heating element wrench to remove the element.
- Soak it in a 50/50 mix of white vinegar and water for a few hours. For stubborn buildup, overnight works even better.
- Scrub gently with an old toothbrush or soft bristle brush.
- Reinstall, refill, restore power.
White vinegar is the real MVP here. A gallon costs about $3 at any grocery store and does a better job on limescale than most commercial cleaners — without harsh chemicals or weird smells lingering in your water afterward.
| Limescale Severity | Soak Time Needed | Element Condition After |
|---|---|---|
| Light (< 6 months) | 1–2 hours | Like new |
| Moderate (6–18 months) | 4–6 hours | Mostly clean |
| Heavy (18+ months) | Overnight | Improved, may need replacement |
| Extreme (3+ years) | Replace element | Don’t bother cleaning |
After cleaning mine, my water heated to temperature about 20% faster according to my smart thermostat data. And my electricity bill went back down to where it had been a year earlier.
4. Clean Around and Behind the Unit — It Actually Matters —
This one sounds almost too simple, but hear me out — it made a real difference for me.
My water heater sits in a utility closet. Over time, dust, lint from nearby laundry, and general debris had built up around the base and especially near the air intake and burner area on my gas heater. That buildup was restricting airflow to the burner, making it run inefficiently.
For gas heaters, blocked air intake = incomplete combustion = wasted fuel and potential carbon monoxide buildup. That second part is genuinely dangerous, not just expensive.
What I do every six months:
- Vacuum around the base and behind the unit using a crevice attachment.
- Wipe down the exterior with a damp cloth — nothing fancy.
- Check the air intake (usually a small vent or screen near the bottom) and clear any blockages.
- Make sure nothing is stored directly against the unit — at least 12 inches of clearance on all sides.
For gas heaters specifically: look at the flame when the burner kicks on. It should be blue with maybe a small orange tip. If it’s mostly yellow or orange, that’s a sign of poor combustion — possibly from restricted airflow or a dirty burner. That’s worth a professional look.
I also started checking this area whenever I do my annual tank flush. Makes it a natural habit rather than a separate task I forget about.
You can find more habits like this in 5 Smart Water Heater Maintenance and Care Guide Habits That Prevent Breakdowns — genuinely useful read if you want to build a routine around this.
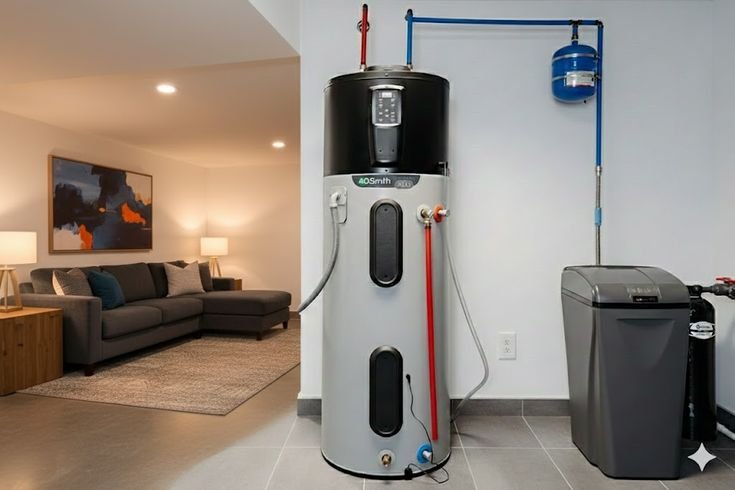
5. Use Vinegar to Flush Internal Pipes and Inlet Filters —
This was the last tip I discovered and honestly the one I felt most silly for not knowing sooner.
Most water heaters — especially tankless models — have small inlet filters that catch debris before it enters the heating system. These filters get clogged over time and reduce water flow. Less flow means the system cycles more, heats less efficiently, and wears out faster.
But even for traditional tank heaters, mineral deposits can build up inside the cold water inlet and hot water outlet connections over time, reducing flow and causing pressure issues.
Here’s my simple cleaning routine for this:
- Turn off water supply and power.
- Locate the inlet filter screen — on tankless units it’s usually right at the cold water inlet connection. On tank heaters, it may not be present, but check your manual.
- Unscrew the connection carefully, pull out the filter screen, and soak it in undiluted white vinegar for 30 minutes.
- Rinse it under running water and reinstall.
For the inlet and outlet connections themselves on tank heaters, I pour a cup of white vinegar directly into the cold water inlet before reconnecting (with the tank off and empty) and let it sit for an hour before flushing.
The first time I did this, the flow from my hot water taps improved noticeably — especially in the kitchen, which is farthest from the heater. My wife actually commented on it without me saying anything, which felt like a win.
Common Mistakes I Made (So You Don’t Have To)
A few things I got wrong early on that cost me time or mild headaches:
Not letting the tank cool before draining. The water in a water heater can be 120–140°F. I rushed this once and got a steam burn on my forearm from a splash. Not serious, but memorable. Always wait at least 30–60 minutes after turning off the heater before you start draining.
Using the wrong size wrench for the anode rod. Went through three trips to the hardware store before I got the right socket size. Check your manual or measure the hex head before you go.
Skipping the hot water faucet step during flushing. Without opening a faucet to let air in, a vacuum forms and the water won’t drain properly. Learned this the hard way when my hose barely trickled.
Over-tightening connections after cleaning. Stripped a plastic drain valve thread once. Now I tighten by hand first, then just a quarter-turn with a wrench.
Waiting too long. All of these tasks are genuinely easy once you’ve done them once. The only real mistake is thinking you’ll get to it “next month” for two years running.
A Quick Cost-Savings Breakdown
Here’s roughly what this maintenance routine has saved me compared to my old “do nothing” approach:
| Task | Frequency | Time Required | Estimated Annual Savings |
|---|---|---|---|
| Tank flushing | Yearly | 45 minutes | $100–180 |
| Anode rod check/replace | Every 2 years | 30 minutes | Avoids $800–1,500 replacement |
| Heating element descaling | Every 18 months | 2–3 hours | $80–150 on electricity |
| Unit cleaning (exterior/intake) | Every 6 months | 15 minutes | Efficiency gains + safety |
| Filter/inlet cleaning | Yearly | 20 minutes | $50–100 on reduced wear |
That’s real money. And most of it comes from tasks that take less than an hour.
The One Tool I Actually Recommend
If you want to level up your water heater monitoring without spending much, grab a simple Wi-Fi water leak detector — brands like Govee or Honeywell make decent ones for $15–30. Place it at the base of your water heater. If there’s ever a slow leak developing (common as seals age), it’ll alert your phone before it becomes a flooded utility room. I’ve had mine for two years and it’s already caught one slow drip before it became a problem.
It won’t replace the cleaning tips above, but it’s a smart companion to this kind of routine maintenance.
My Current Annual Routine at a Glance
- January: Full tank flush + anode rod inspection
- April: Exterior and air intake cleaning
- July: Inlet filter check and clean
- October: Pre-winter inspection — check pressure relief valve, confirm thermostat setting, exterior clean
That’s it. Four maintenance moments a year. My water heater is now eight years old, running efficiently, and my plumber hasn’t seen it since that first visit.
The irony is that most of this stuff isn’t hard — it’s just not something anyone tells you when you move into a house. You have to go looking for it. Hopefully this saves you the $180 learning fee I paid.
If you want to build on these habits, I found this article genuinely helpful for the bigger picture: 10 Essential Water Heater Maintenance Tips That Extend Life — it covers some of what I mentioned here plus a few angles I hadn’t thought about, especially around thermostat settings and pressure relief valves.
About the Author