7 Ultimate Water Heater Cleaning Guide for Beginners
7 Ultimate Water Heater Cleaning Guide for Beginners
There is something oddly comforting about turning on a tap and feeling warm water flow without hesitation. It’s one of those everyday luxuries we rarely think about—until it stops working the way it should. For many beginners, the idea of cleaning a water heater sounds technical, maybe even intimidating. But in truth, it’s a skill anyone can learn, and once you understand the process, it becomes less of a chore and more of a habit that pays off over time.
This guide isn’t just about instructions. It’s about understanding what’s happening inside your water heater, recognizing when it needs attention, and building confidence in maintaining it. Think of it as a conversation between you and your appliance—one where you begin to notice the subtle signs it gives when it needs care.
- understanding what’s inside your water heater
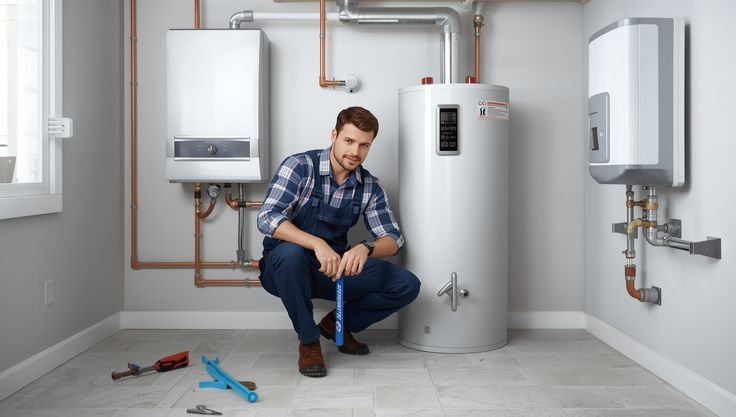
Before diving into cleaning, it helps to picture what’s going on inside that metal tank. Most residential water heaters store water and heat it continuously or on demand. Over time, minerals—especially in areas with hard water—settle at the bottom. This buildup is often called sediment, and it’s the main reason cleaning becomes necessary.
Imagine boiling water in a kettle repeatedly without washing it. Eventually, a chalky layer forms. That’s essentially what happens inside your water heater, only slower and out of sight.
Sediment may seem harmless, but it creates a barrier between the heating element and the water. This forces the heater to work harder, increases energy consumption, and shortens its lifespan. In extreme cases, it can even cause strange noises—popping or rumbling sounds that many people ignore until it’s too late.
Understanding this internal environment makes the cleaning process feel less like guesswork and more like problem-solving.
- recognizing when your water heater needs cleaning
Beginners often ask, “How do I know when it’s time?” The answer lies in observation.
One of the earliest signs is a change in water temperature. If your hot water isn’t as consistent as it used to be, sediment might be interfering with the heating process. Another common clue is reduced water pressure when using hot water compared to cold.
Then there are the sounds. A well-functioning heater is relatively quiet. If you start hearing knocking, popping, or rumbling noises, it’s usually sediment shifting around as water heats up.
Water discoloration can also signal trouble. If your hot water appears rusty or cloudy, it might indicate buildup or corrosion inside the tank.
Rather than waiting for a major failure, these small signals act as early warnings. Paying attention to them can save you from expensive repairs later.
- preparing for the cleaning process
Preparation is where beginners often gain or lose confidence. The idea of dealing with a water heater—especially one connected to electricity or gas—can feel overwhelming. But with the right steps, it becomes manageable.
Start by turning off the power supply. For electric heaters, switch off the breaker. For gas heaters, turn the thermostat to the “pilot” setting. This ensures safety while working.
Next, turn off the cold water supply that feeds into the heater. This prevents new water from entering while you’re cleaning.
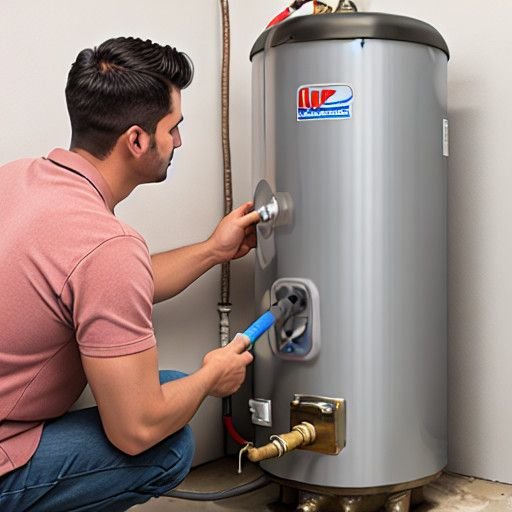
You’ll also need a garden hose and a bucket or access to a drain. The hose connects to the drain valve at the bottom of the tank, allowing you to flush out sediment.
It’s helpful to keep a pair of gloves and a cloth nearby. Water inside the tank can be hot, and handling connections may get messy.
Preparation isn’t just about tools—it’s about mindset. Take a moment to understand each step before acting. This reduces mistakes and builds confidence.
- draining and flushing the tank
This is the heart of the cleaning process.
Attach your hose to the drain valve and place the other end in a suitable drainage area. Open a hot water tap in your home—this prevents a vacuum from forming and allows water to flow more smoothly.
Now, open the drain valve. Water will begin to flow out, often carrying sediment with it. At first, it may look cloudy or contain small particles. That’s exactly what you want to remove.
Once the tank is mostly empty, turn the cold water supply back on briefly. This helps stir up any remaining sediment, flushing it out through the hose. You might need to repeat this process a couple of times until the water runs clear.
This step can feel surprisingly satisfying. Watching murky water turn clear is a visible sign that your effort is making a difference.
Take your time here. Rushing through flushing can leave behind residue, reducing the effectiveness of the cleaning.
- dealing with stubborn buildup
Sometimes, especially if the heater hasn’t been cleaned in years, sediment can become compacted. In such cases, a simple flush might not be enough.
One approach is to gently tap the side of the tank. This can loosen hardened deposits inside. It’s a small trick, but it often helps dislodge stubborn material.
Another method involves using a descaling solution. Vinegar is a popular, beginner-friendly option. After draining the tank, you can introduce vinegar through the inlet and let it sit for a few hours. This helps break down mineral deposits.
After soaking, flush the tank again thoroughly to remove any residue.
It’s important not to use harsh chemicals unless you’re certain they’re safe for your system. Simplicity often works best, especially for beginners.
This stage teaches patience. Not all problems have instant solutions, and sometimes persistence is key.
- checking components during cleaning
Cleaning isn’t just about removing sediment—it’s also an opportunity to inspect your heater.
Look at the drain valve. If it’s leaking or difficult to operate, it might need replacement. Check connections for signs of wear or corrosion.
If your heater has an anode rod, this is a good time to inspect it. The anode rod attracts corrosive elements, protecting the tank. Over time, it wears out and needs replacement. While this step may feel advanced, even beginners can learn to recognize when the rod is deteriorated.
Also, pay attention to the exterior. Rust spots, water stains, or unusual smells can hint at underlying issues.
This step transforms cleaning into preventive maintenance. You’re not just fixing current problems—you’re preventing future ones.
- refilling and restarting safely
Once you’re satisfied with the cleaning, it’s time to bring your water heater back to life.
Close the drain valve and remove the hose. Turn the cold water supply back on and allow the tank to fill. Keep a hot water tap open in your home—this helps release trapped air.
When water flows steadily from the tap without sputtering, the tank is full.
Only then should you restore power or gas. Turning on the heater before it’s full can damage the heating elements, so patience here is crucial.
As the heater warms up, take a moment to listen. The absence of previous noises is often the first reward of your effort.
- building a routine for long-term care
Cleaning your water heater once is good. Making it a habit is better.
For most households, flushing the tank once or twice a year is sufficient. However, if you live in an area with hard water, more frequent cleaning may be necessary.
Setting reminders can help. Think of it like seasonal maintenance—something you do at regular intervals rather than waiting for problems.
Over time, this routine becomes second nature. What once felt complicated turns into a simple, manageable task.
- common mistakes beginners should avoid
Every beginner makes mistakes, and that’s part of the learning process. However, being aware of common pitfalls can save time and frustration.
One frequent error is skipping the power shutdown step. This can be dangerous and should never be overlooked.
Another mistake is not allowing the tank to cool before draining. Hot water can cause burns, so it’s wise to wait or proceed cautiously.
Some people rush the flushing process, assuming one quick drain is enough. In reality, thorough cleaning requires patience.
Others forget to check for leaks after refilling. A small leak can grow into a bigger issue if ignored.
Learning from these mistakes doesn’t just improve your technique—it builds confidence.
- the hidden benefits of regular cleaning
Beyond efficiency and longevity, cleaning your water heater has subtle benefits that many people don’t immediately notice.
For one, it improves water quality. Removing sediment means fewer impurities in your hot water, which can affect everything from bathing to washing dishes.
It also reduces energy consumption. A clean heater doesn’t have to work as hard, leading to lower utility bills over time.
Perhaps most importantly, it gives you a sense of control. Instead of relying entirely on professionals, you become capable of maintaining an essential part of your home.
That sense of independence is hard to quantify, but it’s deeply rewarding.
- a beginner’s mindset: learning by doing
No guide can replace hands-on experience. The first time you clean your water heater, you might feel unsure. That’s normal.
What matters is taking the first step. Follow the process, stay attentive, and don’t rush. Each time you repeat the task, it becomes easier.
Over time, you’ll start noticing patterns—how your heater behaves, how often it needs cleaning, what signs to watch for.
This isn’t just about maintenance. It’s about developing a practical skill that stays with you.
- a simple checklist to remember
Sometimes, a quick checklist helps reinforce what you’ve learned:
Turn off power or gas
Shut off cold water supply
Attach hose to drain valve
Open hot water tap
Drain and flush tank
Remove stubborn sediment if needed
Inspect components
Refill tank and release air
Restore power or gas
Keeping this checklist in mind simplifies the process and ensures nothing is missed.
- closing thoughts
A water heater might not be the most exciting part of a home, but it’s one of the most essential. Taking care of it doesn’t require advanced skills—just attention, patience, and a willingness to learn.
For beginners, the journey starts with understanding and grows through practice. Each cleaning session becomes an opportunity to improve, not just the appliance, but your own confidence.
In the end, it’s not just about extending the life of your water heater. It’s about creating a habit of care—one that reflects in every part of your home.
Frequently Asked Questions (FAQs)
- how often should I clean my water heater
Most experts recommend cleaning it at least once a year. If you have hard water, consider doing it every six months to prevent heavy sediment buildup. - is it safe for beginners to clean a water heater themselves
Yes, as long as you follow safety steps like turning off power and water supply. Start slowly, and don’t hesitate to seek help if something feels unclear. - what happens if I never clean my water heater
Sediment will accumulate over time, reducing efficiency, increasing energy bills, and potentially causing damage that shortens the heater’s lifespan. - can I use vinegar to clean my water heater
Yes, vinegar is a safe and effective option for breaking down mineral deposits. Just make sure to flush the tank thoroughly afterward. - why is my water heater making noise
Noises like popping or rumbling usually indicate sediment buildup. Cleaning the tank often resolves this issue. - how long does the cleaning process take
For beginners, it may take 1–2 hours. With experience, the process becomes quicker and more efficient.
About the Author