9 Easy Tankless Water Heater Guide Mistakes to Avoid Today
Let me be honest with you — when I first switched from a traditional tank water heater to a tankless unit, I was convinced I had everything figured out. I’d watched a few YouTube videos, skimmed through a couple of guides online, and thought, “How hard can this be?”
Famous last words.
Within the first six months, I’d made almost every mistake in the book. Cold water sandwiches at 6 AM. Strange error codes I didn’t understand. A descaling session that ended with a minor flood in my utility room. Good times.
The thing is, most tankless water heater guides — even the well-intentioned ones — skip over the stuff that actually trips people up. They tell you what to do, but not what NOT to do. And sometimes, that’s the more valuable lesson.
So here’s what I wish someone had told me before I started.
1. Skipping the Flow Rate Calculation Before Buying
This is where most people go wrong before they even install the unit. They see “unlimited hot water” on the box and stop reading.
But here’s the real question: how much hot water do you actually need at once?
Tankless heaters are rated by gallons per minute (GPM). If your shower needs 2.5 GPM and your dishwasher pulls another 1.5 GPM, you need a unit that can handle at least 4 GPM — simultaneously.
A quick reference table for common fixture flow rates:
| Fixture | Average GPM Needed |
|---|---|
| Shower | 1.5 – 2.5 GPM |
| Kitchen Faucet | 1.0 – 1.5 GPM |
| Dishwasher | 1.0 – 1.5 GPM |
| Washing Machine | 1.5 – 2.0 GPM |
| Bathroom Faucet | 0.5 – 1.0 GPM |
I bought a unit rated for 6 GPM thinking that was plenty. What I didn’t calculate was that on winter mornings, my groundwater temp drops significantly — and colder incoming water means the heater works harder and delivers less GPM at the temp I want.
Don’t skip this math. It takes five minutes and saves you months of frustration.
2. Ignoring the Incoming Water Temperature in Your Region
This one caught me completely off guard.
Tankless heaters have to raise water from your groundwater temperature to your desired output temperature. In Florida, groundwater might come in at 72°F. In Wisconsin in January, it could be 37°F.
That difference is massive in terms of how your unit performs.
Most manufacturers list GPM ratings based on a temperature rise of around 70°F. But if you need a rise of 90°F or more, your effective GPM drops — sometimes significantly.
Temperature rise impact on GPM (example for a 7 GPM unit):
| Temperature Rise Needed | Effective GPM Delivered |
|---|---|
| 35°F | ~7.0 GPM |
| 55°F | ~5.5 GPM |
| 70°F | ~4.2 GPM |
| 90°F | ~3.0 GPM |
If you’re in a cold climate and nobody warned you about this, you’ve probably blamed your unit when the real issue was just undersizing for your region.
3. Not Flushing and Descaling on a Regular Schedule
I put this off for almost two years. “It’s tankless,” I told myself. “Nothing builds up.”
Wrong.
Mineral deposits — especially calcium and magnesium — absolutely build up inside the heat exchanger. Hard water areas are especially brutal. Once scale builds up enough, your heater becomes less efficient, runs hotter to compensate, and eventually throws error codes.
For most homes, descaling once a year is the minimum. If you’re in a hard water area, every six months is smarter.
The process isn’t complicated. You’ll need:
- A descaling pump kit (Camco and Eccotemp make affordable ones)
- Food-grade white vinegar or a commercial descaler like CLR
- Two washing machine hoses
- About 45–60 minutes
Basic descaling steps:
- Turn off the cold water supply to the heater
- Connect your pump to the service ports (most modern units have these)
- Run the descaling solution through for 45–60 minutes
- Flush with clean water for 10–15 minutes
- Reconnect and test
It’s genuinely not hard once you’ve done it once. The mistake is waiting until you have a problem to start.
You can find more detailed guidance on this in this 5 Powerful Water Heater Maintenance and Care Guide Descaling Tricks That Save Money article — worth bookmarking.
4. Setting the Temperature Too High (Or Too Low)
There’s this common idea that cranking up your water heater temperature means you’ll always have plenty of hot water. But with tankless units, that logic works differently — and can backfire.
Too high (above 140°F):
- Scalding risk, especially for kids and elderly
- Increased mineral scaling
- Higher energy bills
- Possible unit damage over time
Too low (below 120°F):
- Risk of Legionella bacteria growth in pipes
- Lukewarm water complaints
The sweet spot most plumbers recommend is 120°F for most households, bumping to 140°F only if you have a dishwasher without a booster heater or specific medical needs.
Most modern units like the Rinnai RUR199 or Rheem RTGH series let you set this digitally right on the panel. No guesswork needed.
5. Overlooking Venting Requirements for Gas Units
Gas tankless heaters are powerful. They’re also unforgiving when it comes to venting.
I’ve seen people — and I almost did this myself — try to reuse old venting from a traditional tank heater. That’s a mistake. Tank heaters and tankless units often use different vent diameters, materials, and configurations.
There are three main venting options:
- Direct vent (sealed combustion): Draws air from outside. Best for airtight homes.
- Power vent: Uses indoor air, exhausts outside via a fan.
- Non-power vent: Relies on natural draft. Less common in modern installs.
Getting venting wrong doesn’t just reduce efficiency — it can be genuinely dangerous. Improper venting can cause carbon monoxide buildup.
If you’re even slightly unsure, hire a professional for this part. The rest of the install, you might handle yourself. The venting, don’t mess around.
6. Forgetting to Install a Water Softener or Pre-Filter
Your tankless heater is only as good as the water going into it.
If you’re on municipal water with moderate hardness, you might get away without a softener. But if your water is hard (above 7 grains per gallon or 120 mg/L), you’re basically running sandpaper through your heat exchanger every day.
Signs your water is too hard:
- White crusty buildup around faucets and showerheads
- Spots on dishes after washing
- Soap that doesn’t lather well
- Scale around the base of your heater
A whole-house water softener is the ideal fix. But even a sediment pre-filter (a simple inline filter before the unit) helps catch debris and reduce particle damage.
Brands like Watts and Pentair make solid pre-filter setups that aren’t expensive and take about 20 minutes to install.
If you want to understand how cleaning connects to performance, these 8 smart water heater cleaning habits that protect your heater go into great detail on exactly this.
7. Misreading Error Codes and Immediately Calling a Technician
Error codes on tankless heaters look scary. But most of the time, they’re pointing to something simple.
I called a plumber for an error code that turned out to be a dirty inlet filter. Cost me $120 in labor for a 10-minute fix I could have done myself.
Common error codes and what they usually mean:
| Error Code (General) | Likely Cause | DIY Fix? |
|---|---|---|
| No ignition / 11 | Gas supply issue or dirty igniter | Check gas valve first |
| Overheating / 51 | Scale buildup or blocked vent | Descale or check venting |
| Low water flow / 10 | Clogged inlet filter | Clean the filter |
| Flame failure / 12 | Gas pressure issue | Check supply, may need tech |
| Exhaust blockage / 14 | Blocked or improper venting | Inspect and clear vent |
The error code meanings vary by brand. Rinnai, Navien, Noritz, and Rheem all have slightly different codes — but all of them publish free troubleshooting guides on their websites and apps.
Before calling anyone, look up your exact model’s error code. The Rinnai app, for instance, lets you scan your unit and walk through guided troubleshooting from your phone. Pretty handy.
8. Not Accounting for the “Cold Water Sandwich” Effect
This one drives people absolutely crazy, especially if they upgraded from a tank heater expecting everything to be better.
The cold water sandwich happens when:
- Someone uses hot water briefly (washing hands, quick rinse)
- The heater kicks on, heats water, then shuts off
- Warm water sits in the pipes
- The next person turns on the tap and gets that residual warm water
- Then — cold water from the pipes
- Then — hot water again as the heater fires back up
That middle burst of cold? That’s the sandwich.
It’s not a defect. It’s just physics.
The fixes include:
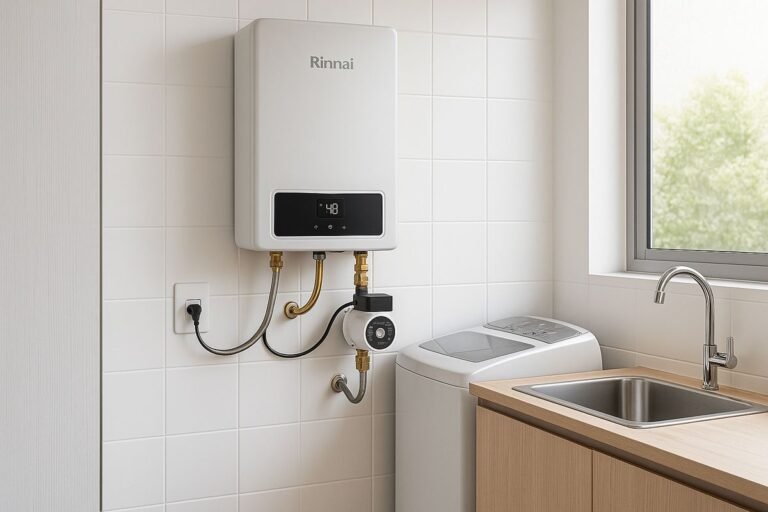
- A recirculation system — either built-in (like Navien’s) or added via a Watts recirculation pump
- A small buffer tank — a 2–5 gallon tank that keeps a reserve of hot water ready
- Adjusting usage habits — just knowing it happens makes it less annoying
Not every guide mentions this, and people sometimes return perfectly good units thinking they’re broken.
9. Neglecting Annual Professional Inspections
I get it. Tankless heaters feel maintenance-free compared to tanks. No pilot light babysitting, no anode rod to worry about, no 40-gallon bomb in your basement. It’s easy to just… forget they need attention.
But a yearly check — even a quick one — catches things that build up slowly and invisibly.
A good annual inspection covers:
- Inlet filter cleaning (quick but important)
- Venting inspection (especially after any home renovations)
- Gas pressure check (for gas units)
- Electrical connections (for electric units)
- Scale assessment in the heat exchanger
- Temperature and pressure relief valve test
Most HVAC or plumbing companies offer this as a package service. It usually runs $75–$150 depending on your area. Compare that to a heat exchanger replacement ($500–$1500) or a full unit replacement ($1000–$3000+) and it’s pretty easy math.
You can also pair professional visits with your own seasonal habits. These 6 essential water heater maintenance and care guide checks before winter are a great starting point for what to look at yourself before the cold months hit.
Real Talk: What I’d Do Differently
If I were starting over with a new tankless install, here’s the short version:
- Size it correctly from day one — calculate your actual peak demand
- Install a pre-filter and consider a softener if your water is hard
- Set a calendar reminder for descaling — treat it like an oil change
- Learn your error codes before something goes wrong, not after
- Don’t skip the recirculation pump if comfort matters to you
The technology itself is genuinely excellent. Tankless heaters are more efficient, last longer (often 20+ years vs. 10–12 for tanks), and deliver endless hot water when properly sized and maintained. The mistakes above aren’t deal-breakers — they’re just avoidable detours.
A Few Numbers Worth Knowing
| Metric | Tank Heater | Tankless Heater |
|---|---|---|
| Average Lifespan | 10–12 years | 18–25 years |
| Energy Efficiency | 60–70% | 80–98% |
| Standby Heat Loss | Yes (significant) | None |
| Space Required | Large (floor space) | Small (wall-mounted) |
| Hot Water Supply | Limited by tank size | Continuous |
| Upfront Cost | Lower ($400–$900) | Higher ($800–$2500+) |
| Annual Maintenance | Moderate | Low-moderate |
The bottom line is that tankless water heaters reward the people who pay attention to them. Not obsessively — just intentionally. A little maintenance, the right sizing, and a basic understanding of how they work goes a very long way.
Skip the mistakes above and you’ll probably love your unit. Make all of them at once like I did, and you’ll spend a few frustrated months figuring out what went wrong.
Learn from my utility room flood. Install that descaling kit.
Also worth reading: 10 Essential Water Heater Maintenance Tips That Extend Life — a comprehensive breakdown that pairs well with everything covered here.
About the Author